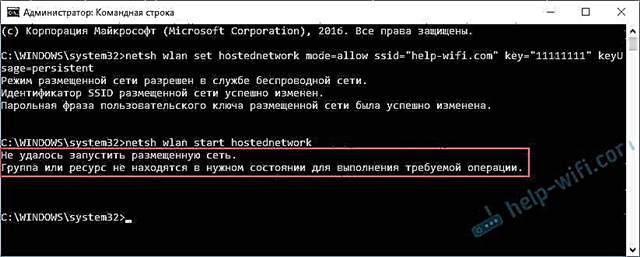
The most common error that you can encounter while starting a Wi-Fi hotspot in Windows is "The hosted network could not be started." The error itself may have a different description. But the problem is always in one thing: it is not possible to distribute Wi-Fi from a computer or laptop. This error appears after running the "netsh wlan start hostednetwork" command on the command line. The virtual Wi-Fi network itself is created (by the first command), but it cannot be started.
I observed the error "Failed to start the hosted network" in Windows 10 and Windows 8, as well as in Windows 7. The solutions will be approximately the same. Honestly, there is no one concrete and working solution. Based on my experience, comments on various articles and information on the Internet, I will try to collect the most popular and working solutions. I will describe in detail and show you what to do if you cannot start Wi-Fi distribution via the command line.
Update: important information for Windows 10! If you cannot start the access point through the command line in Windows 10, then most likely the reason is that you have new hardware (Wi-Fi adapter), the driver of which no longer supports Soft AP. Microsoft is completely removing the Soft AP feature (launching a virtual Wi-Fi network through the command line) from the driver for new devices in Windows 10, in favor of Wi-Fi Direct, through which the Mobile Hotspot function works.
As I wrote above, the error itself appears after running the netsh wlan start hostednetwork command. And it can be with a different description. I know three:
- Failed to start hosted network. The group or resource is not in the correct state to perform the requested operation.
- Failed to start hosted network. The wireless LAN interface is off.
- Or: "The attached device is not working."

Most likely, you have the first option, which is in the screenshot. Since this is the most popular case. But, if you have a different description of the error, then this is not so important, since the solutions will be the same. I will do everything on the example of Windows 10. If you have Windows 7, or Windows 8, then all solutions will suit you.
Solution of the error "Failed to start hosted network" when distributing Wi-Fi network
Most often, this error is associated with the operation of the wireless Wi-Fi adapter. Perhaps you have it disabled. The driver is not installed, or a non-working driver is installed. Or you don't have a wireless adapter at all.
First, a few important points:
- If you want to share Wi-Fi from a stationary computer, then make sure that your PC has a Wi-Fi adapter and a driver is installed on it. Typically, computers do not have built-in receivers. Therefore, use USB or PCI adapters.
- If you have a laptop, there is a built-in adapter. But it may be disabled, or it may not have a driver installed. Wi-Fi on your laptop should work.
- See detailed instructions on how to share Wi-Fi on Windows 10 and how to share Wi-Fi on Windows 7. You may be doing something wrong.
- Run the command line as administrator.
- If you have Windows 10, then try to distribute the Internet via a mobile hotspot.
Let's move on to more serious solutions.
Checking Wi-Fi adapter (hosted network) in device manager
We need to open the Device Manager. In Windows 10, the easiest way is to right-click on the Start menu and select Device Manager. In any case, you can press Win + R, enter the commandmmc devmgmt.msc and click Ok. Or run it through properties in My Computer. There are many ways.
In the manager, immediately open the "Network adapters" tab. Let's see if there is an adapter in the name of which is "Wi-Fi", "Wireless", or "WLAN". If there is, that's good. If not, then most likely you do not have a Wi-Fi driver installed, or there is no adapter at all in your computer. You need to install the driver. You may find the article useful: installing a driver on Wi-Fi in Windows 10, or using Windows 7 as an example.
If you have a wireless adapter in Device Manager, then pay attention to the icon near him. If there is an arrow next to the icon, then click on the adapter and select "Enable".

After that, try to start the distribution of the Wi-Fi network.
Checking the Microsoft Hosted Network Virtual Adapter
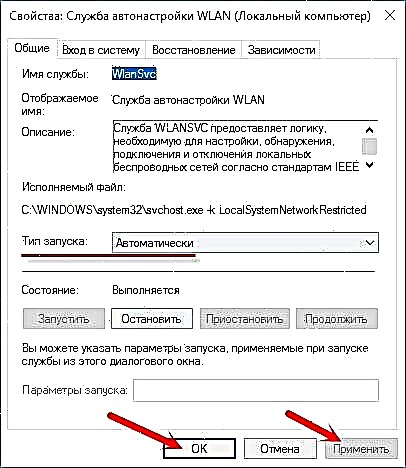
If there are no icons next to the adapter, it is turned on and working fine, you should also check "Virtual Hosted Network Adapter (Microsoft)
"," Microsoft Hosted Network Virtual Adapter ", or" Microsoft Wi-Fi Direct Virtual Adapter. "They are responsible for distributing the Wi-Fi network.
To see them, you need to go to the "View" menu and check the box next to "Show hidden devices".

Perhaps these adapters are also disabled and need to be enabled.

It is because of the incorrect operation of these adapters that most often it is impossible to start a virtual Wi-Fi network in Windows.
Reinstalling the Wi-Fi adapter
To get started, simply unplug and re-enable the adapter. Maybe this will help.

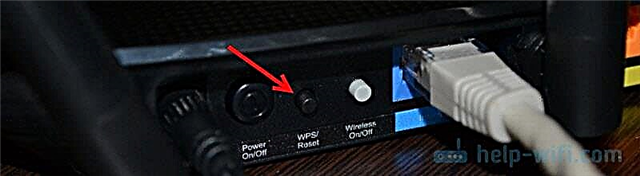
If the icon near the adapter transparent (extinct) (there is one in the screenshot above) and there is no "Enable" option, and when you open the adapter properties you see the inscription "This device is not connected to the computer. (Code 45)", then you need to try turning on Wi-Fi with a keyboard shortcut on your laptop. The keyboard shortcut itself depends on your laptop manufacturer. On ASUS, it's FN + F2. I wrote more about this here.
Also near the adapter there may be yellow exclamation mark, and in the properties the message "This device is not working properly." In this case, first try to remove the Wi-Fi adapter and click on the "Update hardware configuration" button.

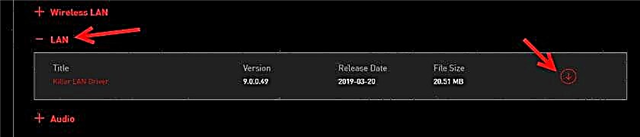
Reboot your laptop. If this does not help, then reinstall the Wi-Fi adapter driver. I gave links to articles on this topic above. Download the driver from the manufacturer's website for your laptop model and installed Windows, and install it.
Try starting the hosted network with "netsh wlan start hostednetwork".

I did it.
We fix the problem with starting the hosted network using commands
Run Command Prompt as Administrator. If you want to start a virtual Wi-Fi network, then the command line is most likely already open.
Run the following commands one at a time:
netsh wlan set hostednetwork mode = disallow
You should see the message: Hosted network mode is not allowed in the wireless network service.
netsh wlan set hostednetwork mode = allow
Result: Hosted network mode is enabled on the wireless network service.

Then try to start the distribution of Wi-Fi with the commands:
netsh wlan set hostednetwork mode = allow ssid = "help-wifi.com" key = "11111111" keyUsage = persistent
netsh wlan start hostednetwork
Everything should work out.
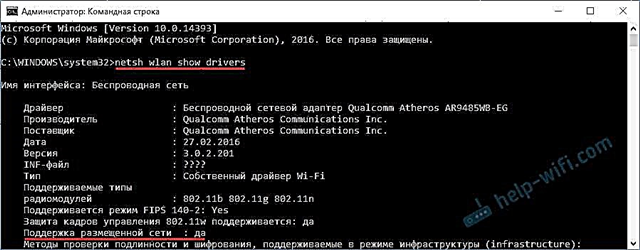
Netsh wlan show drivers: check hosted network support
Run the command in the command line as administrator:
netsh wlan show drivers
Find the line "Hosted Network Support" next to it should say "Yes".

If you have "No", it means that your adapter is not able to distribute Wi-Fi. It may be because of the same driver that needs to be updated or reinstalled. Or maybe it doesn't support this feature.
I hope my advice helped you get rid of the error "The hosted network could not be started. The group or resource is not in the correct state to perform the required operation.", And you were able to share the Internet from your computer.
It is possible that after launching the network, you will face another problem: when, after connecting to Wi-Fi, the Internet will not work. I wrote about the solution to this problem in the article: Distributed Wi-Fi from a laptop, and the Internet does not work "Without Internet access" and Cannot share the Internet via Wi-Fi in Windows 10.
Ask questions in the comments, attach screenshots of your mistakes, share tips and solutions!