I have already published more than one article on DLNA setup. We ran the DLNA server in different ways, on different devices, and for different TVs. In this tutorial, I will show you how to enable DLNA server in Windows 10. Let it be a computer or a laptop, it doesn't matter. The main thing is that Windows 10 is installed on it. There are many different programs with which you can run a media server on your computer. But in this tutorial, we will not use any third-party software. We will use only standard Windows 10 tools. In addition, this feature is available in both Windows 8 and Windows 7. There are not many differences.
And so, to begin with, let's figure out what DLNA is, why run this server on a computer, laptop and what to do with it. Everything is very simple. DLNA technology can transfer media content (video, photo, music) between devices on a local network. Most often, this technology is used to view videos or photos on a Smart TV on a computer. I wrote in more detail about this technology in the article: DLNA technology. DLNA usage on smart TVs and other devices. If interested, you can read.
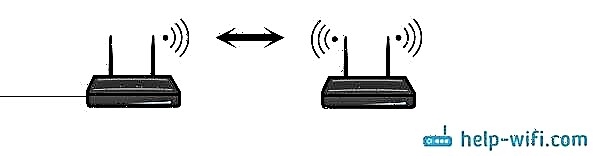
How it all works: Smart TV must be connected to our router. Via Wi-Fi network, or by cable. It does not matter. To the same router, the computer on which we want to run the media server must be connected, and from which we want to play video, photo, or music on the TV. The main thing is that the devices are in the same local network (they are connected through one router). This does not mean that there should be only one computer and one TV, there can be several of them. Moreover, there may be other devices on the network that support DLNA. For example: game consoles, TV boxes, satellite receivers, etc.
Before proceeding with the setup, make sure that your computer and TV are connected to your Wi-Fi network, or with a network cable to your router. Check if the internet is working on the TV. If you don't know if your TV supports DLNA, then this information can be found in the specifications. I will say this, if there is a Smart TV on the TV, then everything will work.
And in the Microsoft Edge browser in Windows 10, you can display videos, photos and music directly from the browser on TV. How to do this, I wrote in this article.
I think we figured out all the nuances, now you can start setting up.
A video clip, film, almost any video can be displayed from the computer to the TV in a few clicks. Turn on your TV. Make sure it is connected to the internet (to your router).
On the computer, open the folder with the video, and right-click on the file that we want to play on the TV (Smart TV). Then we move the cursor to the item "Transfer to device". Our TV set should appear there. If there is an inscription "Searching for devices ...", then you need to wait a little. Leave the menu open, or try in a couple of seconds. As you can see in the screenshot below, Windows 10 found two TVs for me: LG and Philips.

Choosing a TV. The player control window will appear immediately. Here you can control the video playback on your TV, add other files to the playlist, see information on TV, etc.

The TV will immediately start playing the running movie.
We have just started watching video from computer to TV using DLNA technology. As you can see, everything works. And all this wirelessly, by air. It's over if you have both devices connected via Wi-Fi.
Launching DLNA Server on Windows 10 by Standard Means
Above, we examined a method when you can send files from a computer to a TV. But, there is still a great opportunity when we can view all the files (to which access is open) that are stored on our computer from the TV. I think this is what you need.
You can use third-party programs to run the DLNA server, for example, "Home Media Server (UPnP, DLNA, HTTP)". I wrote about setting up using this program in the article setting up a DLNA server for a Philips TV. We watch movies from the computer on the TV. This program is suitable for all TVs. But each manufacturer usually has its own program. LG, for example, has Smart Share. I wrote about the setting here.
Well, on the other hand, why do we need third-party programs if in Windows 10 everything can be configured with built-in tools.


If your TV is not on the list, then wait a bit. Alternatively, close and reopen the media streaming settings.

Each device will have a "Configure ..." button. If necessary, you can configure individual settings for each device.


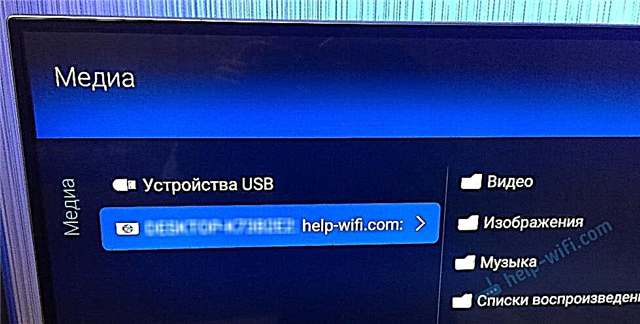
As you can see in the screenshot above, access will immediately be opened to three standard folders: "Videos", "Pictures", "Music". All files that are in these folders can be viewed on TV.
These three folders are located on the system drive. Agree, it is not very convenient to copy the necessary films and other files there all the time in order to watch them from the TV. Therefore, you can simply share other folders.
How to add a folder for a DLNA server
Start Windows Media Player.

If you want to add a folder with video, for example, click on the corresponding item on the left, and select "Manage video library".

In the new window, click on the "Add" button. Select the folder to which you want to open access via DLNA, and click on the "Add folder" button.

Any required folder will appear in the list and will be displayed on the TV. For example, I opened access to the "Videos" folder, in which I store films.

You can add any folders in this way, or remove them from the list.
Some more tips
1If you need to open your media streaming settings, you can do so from Windows Media Player. Just click on the "Stream" menu item, and select "More Streaming Options ...".

Several related articles:
- How to connect a TV to a laptop via Wi-Fi or HDMI cable in Windows 10?
- How to connect a computer (laptop) to a TV via Wi-Fi?
- Media server (DLNA) on ASUS Wi-Fi router and TP-LINK.
If video playback slows down
When playing video in this way, many are faced with unstable work. The playback freezes all the time, goes with delays, stops, etc. Mostly, such problems arise when playing large video files. Typically, these problems appear due to a lack of connection speed between the computer and the TV. More often than not, a budget, weak router is to blame. There just isn't enough bandwidth. However, a powerful router does not guarantee stable DLNA file transfer.
At the time of viewing, disable various downloads, online games, do not use the Internet on other devices. If possible, connect your TV or computer (or better both devices) to the router via a network cable. Then the connection will be much more stable and the speed is higher.
If all else fails, then you can use a more stable HDMI cable connection to output images from a computer or laptop to a TV. Or just copy movies from your computer to a USB flash drive or external hard drive and watch them on your TV.