There is one very popular topic of sharing the Internet from a laptop over a Wi-Fi network. A lot of different articles have already been written on this topic, I decided to keep up and also prepare detailed instructions with pictures for setting up Wi-Fi distribution from a laptop on Windows 7. We will set up a virtual network through the command line, without any third-party programs. I will try to make the article simple and straightforward, as this topic can get a little confusing. I will also write about possible problems and their solutions, which can be encountered when setting up Wi-Fi distribution in Windows 7.
A few words about the function itself, and let's move on to step by step instructions. So in Windows 7 (this article will be on the example of this particular operating system, for Windows 10 there is a separate article), there is such a function as Virtual WiFi. What it is? Let me tell you by example: you have a laptop or a computer with a Wi-Fi adapter. Your laptop is connected to the Internet via a network cable, or via a USB modem. And also, you do not have a Wi-Fi router (which could distribute the Internet via Wi-Fi), but there are devices that can be connected to the Internet via Wi-Fi: tablets, phones (Android, iOS), other laptops, TVs and so on. Sometimes I see questions: how to distribute Wi-Fi for Android? etc. It doesn't matter what device you have, and on which system it works. The scheme will be standard. By setting up the network in the manner described below, you can distribute Wi-Fi to your phone, tablet, iPhone, TV, or other laptop.
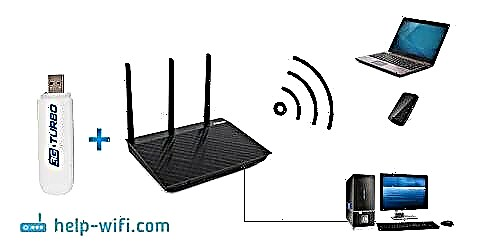
We take our laptop, to which the Internet is connected, launch a virtual Wi-Fi network on it, the laptop distributes the Internet via Wi-Fi, and to the wireless network we launched, you can already connect your devices and use the Internet. A laptop (or a stationary PC with an adapter) acts as a Wi-Fi router for us.
This is very convenient when, for example, you need to distribute the Internet to several devices, but you don’t want to buy a router, or you don’t need to. Of course, if you have a lot of devices that need to be connected to the Internet via Wi-Fi, and you often use them, then, frankly, it is better to buy a router, even if the cheapest one. You can see the article with tips for choosing a router. It will work more stable than a virtual network, but this function may come in handy. Therefore, we will now configure.
Configuring the distribution of Wi-Fi in Windows 7 using the command line
A few important points before setting up:
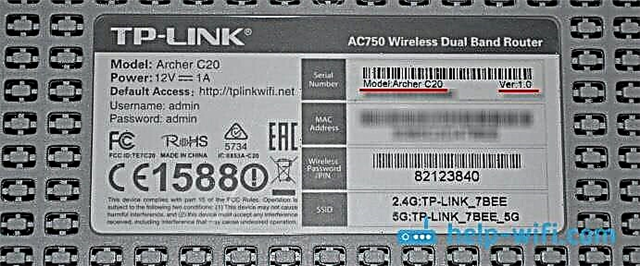
- Your laptop must have a Wi-Fi adapter. It is built into almost all laptops. But if you have a stationary computer, then you most likely need an external receiver that connects to the USB port. Or in a PCI slot. I wrote about such adapters here.
- The driver must be installed on the Wi-Fi adapter. Moreover, the driver must support Virtual WiFi. If you cannot start the virtual network, then update the driver of your Wireless adapter to the latest version. For more information on installing (updating) the driver, you can see a separate article.
- To distribute the Internet via Wi-Fi, the Internet must be connected to your laptop and it should work.
Since we will configure everything with commands through the command line, first, you need to run it.
It is advisable to run the command line as administrator. Go to Start, in the search bar write cmd, right click on "cmd. exe", and select Run as administrator... Or: Start - All Programs - Accessories - "Command Line".

Next, we need to execute the following command:
netsh wlan set hostednetwork mode = allow ssid = "help-wifi-com" key = "12345678" keyUsage = persistent
Note: "help-wifi-com" Is the name of the Wi-Fi network that your laptop will broadcast. AND"12345678" - this is the password that will need to be specified when connecting to the network. You can change the name and password to your own. But make the password at least 8 characters. From numbers and English letters.
Copy this command to the command line, and press Enter.

If all is well, you will see a report that the creation of the network is possible, the network name has been changed, and the password has also been changed.

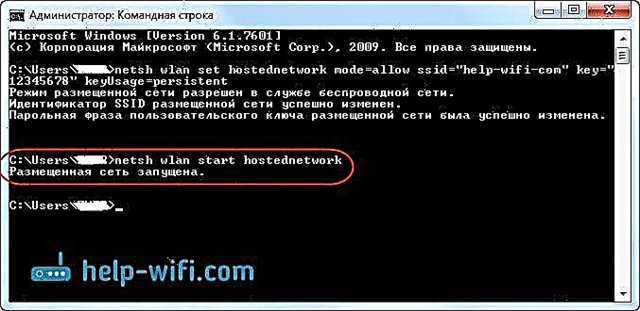
You need to start the created virtual network. To do this, run the command:
netsh wlan start hostednetwork
Copy it, paste it into the command line, and press Enter. You should see a report Hosted network started.

If everything is as in the picture above, then everything is fine!
The network is started, if you turn on Wi-Fi on your device that you want to connect to the Internet, then take the wireless network there with the name that was specified in the first command. You can already connect to it using the set password. But, the Internet will most likely not work. That is, the laptop distributes Wi-Fi, but without access to the Internet. We need to enable Internet Sharing. Now I will show you how to do it.
Allow Internet Sharing in Windows 7
Right click on the internet icon and select Network and Sharing Center.

On the left, select Change adapter settings... In the same window, you can see the virtual network launched by us. So far, it has a "No Internet Access" status.

Further attention! Right-click on the adapter through which you have an Internet connection to your computer... If you have regular internet via a network cable, then this is most likely "Local Area Connection". Click on it and select Properties.

In the new window, go to the tab Access, put a tick next to "Allow other network users to use this computer's Internet connection"... And in the drop-down menu, selectWireless network connection 3 (you may have a different number at the end). Push Ok.

If you do not have the "Access" tab, or you cannot select the connection you need, then see the solutions here (the instructions are based on the example of Windows 10, but in Windows 7 everything is exactly the same).
After that, it is advisable to restart the computer and start the Wi-Fi distribution with the command:
netsh wlan start hostednetwork
That's it, the laptop will distribute Wi-Fi with internet access. You can connect your devices to the created network.
Virtual Wi-Fi network management:
Commands that will be useful to you:
After turning off / on the computer to restart the network, use this command:
netsh wlan start hostednetwork
If you want to change the network name (SSID) or password, you can do this with the following command (do not forget to replace the name and / or password with your own):
netsh wlan set hostednetwork mode = allow ssid = "help-wifi-com" key = "12345678" keyUsage = persistent
To stop the network, you can use the command:
netsh wlan stop hostednetwork
Well, if you forget the password that is used to connect to your wireless network, then just run the command:
netsh wlan show hostednetwork setting = security

You can configure the access point to start automatically when the laptop is turned on. If you need it.
All sorted out with the management. Now I'll tell you more about the most popular problems and their solutions.
Possible problems when distributing the Internet from a laptop
Devices do not connect to the created network. I ran into this problem myself, and quickly solved it. The essence of the problem is that you have launched a Wi-Fi network, and your phone, tablet, or other device simply does not connect to this network. Errors appear: "Failed to connect to the network", or there is a constant "Obtaining an IP address".
Decision: It is almost always the fault of antivirus, firewall, or other software that can block the connection. My phone didn't want to connect in any way. I disabled the built-in firewall on my Dr.Web anti-virus, and the phone immediately connected to the Wi-Fi network.

If such a problem appears, immediately try to disable your antivirus, or the firewall built into it. It blocks the connection and prevents the phone from connecting. If after disabling protection, all devices connect perfectly, you need to add the connection to the antivirus exclusions. If necessary, I will prepare small instructions for popular antiviruses.
The Wi-Fi network is working, the devices are connecting, but the Internet is not working. Another popular problem is when everything seems to be fine, everything connects, but when you try to open a website on the same phone, nothing opens. It is just loading, or there is an error that the page cannot be opened. Programs that need internet access also do not work.
Decision: Most likely, you have not allowed Internet sharing in your connection settings. I wrote about this in detail above. Be sure to check your settings. Restart your computer and restart the network. You can also try disabling your antivirus. And yet, make sure that the Internet is working on the computer from which you are distributing Wi-Fi. There is a separate article on solving this problem: we distributed Wi-Fi from a laptop, and the Internet does not work "Without access to the Internet."
Error: "The hosted network could not be started. The group or resource is not in the correct state to perform the requested operation."... This error can be seen when trying to start the network at the command line.

And this happens due to problems with the Wi-Fi adapter of your laptop, or a stationary computer. More precisely, because of the driver for this wireless adapter. Most likely, the driver for Wi-Fi is not installed, and if it is installed, then it does not support Virtual WiFi. It may also be such that the virtual adapter driver is simply disabled in the device manager.
Decision: Install or update the Wireless adapter driver. Download the driver from the official website of your laptop (or the adapter itself), for your model and operating system, and install it. Wi-Fi should work for you and be turned on. Check out the article https://help-wifi.com/nastrojka-wi-fi-na-pc-noutbuke/kak-podklyuchit-noutbuk-kompyuter-k-internetu-po-wi-fi-problemy-s-podklyucheniem-k- wi-fi /, after the heading "Check and install the driver on Wi-Fi". Later I will try to prepare a separate article on this topic.
Conclusion
I tried very hard to do just a step by step article. I hope I got it. Yes, the instruction turned out to be great, but I think that you can easily configure the distribution of Wi-Fi in Windows 7 for your mobile devices. Once configured, you only need to start the network itself with one command.
If something does not work out for you, then first carefully read about the possible problems that I described above. Check out the article: I can't share Wi-Fi from a laptop on Windows 7. You can ask questions in the comments. And do not forget to share useful information on the topic of the article 🙂