In the instructions for configuring TP-LINK routers, I always write about configuring via a browser. When we open the control panel of the router through the browser, and set the necessary parameters. But, there is another simple and quick way to set up a TP-LINK router - using the Easy Setup Assistant program, which is located on the disk that comes with the router.
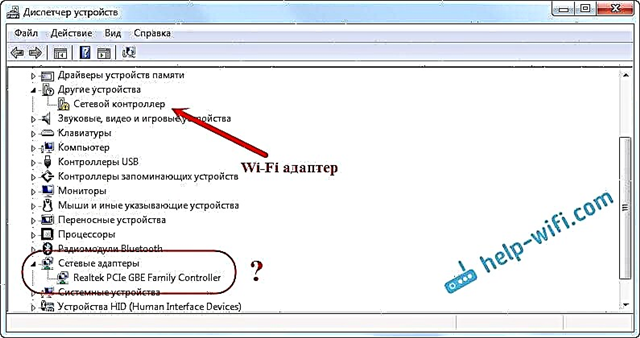
With all the TP-LINK routers that I had, in the kit you could find a small disk on which this very Easy Setup Assistant utility is located. With which you can quickly configure your TP-LINK router. By the way, many are looking for and want to download drivers for the TL-WR841ND router, and other models. It seems to me that people have to introduce this particular utility for quick setup. Since there are no drivers for routers (except for some mobile devices).

The disadvantages of this setting are that only basic parameters can be set there (connect, configure the Internet and Wi-Fi network). But on the other hand, the average user doesn't need anything else. And yet, not everyone has computers or laptops. And if there is, it is not a fact that there is a CD / DVD drive. Many laptops are now sold without a drive.
And the advantages of setting up a TP-LINK router from a disk are that the Easy Setup Assistant utility allows you to perform step-by-step configuration. Now we will look at everything, using the example of the TP-LINK TL-WR740N router (there is also an instruction for configuring this model through a browser). I wanted to show the setting on the example of TP-LINK TL-WR841ND, but now this model is not available. And this instruction will be universal. Suitable for any TP-LINK router. True, I do not know how it is with new devices. But with the new Archer C20i router, the kit included exactly the same disk with the utility.
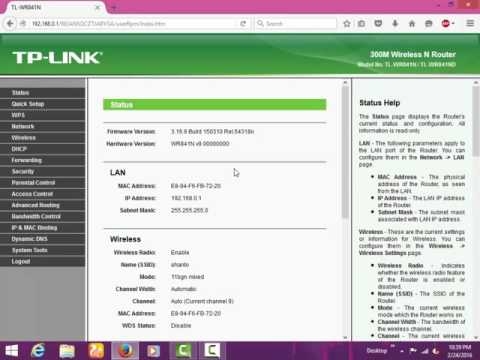
If you decide to configure through the utility, then see the instructions below, and if you want to configure the router through the browser, then go to the https://help-wifi.com/category/tp-link/ category, select your router model, and follow the instructions. And yet, we have this article: how to set up a router without a disk with the program.
Well, do not forget that TP-LINK also has a "Tether" program. Which is designed for configuring and managing routers from mobile devices.
Where can I download the TP-LINK Quick Setup Wizard?
It is best to run the Easy Setup Assistant utility from the supplied CD. If there is no disk, or there is no way to start it, then the utility for quick setup can be downloaded. Follow the link http://www.tp-linkru.com/download-center.html. Select the model of your device, then the hardware version (look at the bottom of the router on the sticker, for example, V2), go to the "Utility" tab, and download the archive with the utility by simply clicking on the link with the name, for example: "Tp-Link TL-WR841N_V8_Easy Setup Assistant_131119_CA ". Then, just open the downloaded archive and run the "EasySetupAssistant.exe" file.
But, in this case, the utility will most likely be in English, which will complicate the setup process a little. On disk, the Easy Setup Assistant utility will most likely be in Russian.
Step-by-step, quick configuration of the TP-LINK router using the program
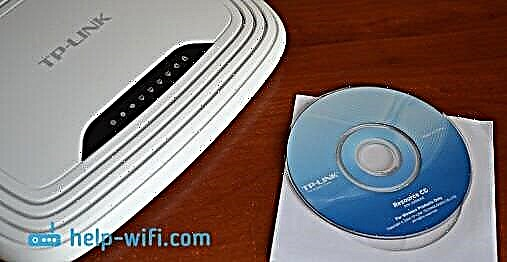
Do not connect the router yet. We take a disk, insert it into a computer or laptop drive. If the utility does not start automatically (it did not start for me), then open "Computer" or "This computer" (in Windows 10), then open the "CD-drive" and run the file "Autorun.exe".
The quick setup wizard will open. We do everything strictly according to the instructions. Hover the mouse over our model (in my case, it's TL-WR740N), and select "Quick Setup Wizard".

A window of the wizard itself will open. Select the Russian language (if any), and click "Start".

Attention! At this point, the utility will automatically turn off Wi-Fi on your laptop, if any. Whatever he does not interfere with us in the router setting.
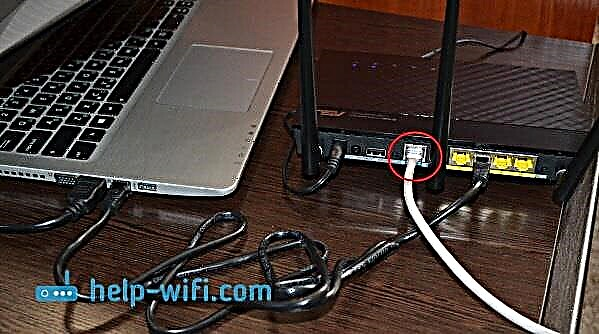
In the setup wizard window, we will see instructions, which will say that we need to connect the router to the computer via a cable. We use the cable that came with the kit. Click Next.

The next step is to connect the Internet to the router. Connect the cable from your Internet provider or ADSL modem to the WAN connector. After connecting, click on the "Next" button.

On the next page, the setup wizard will ask us to connect power to the router. We plug in the power adapter, plug it into a power outlet. If the indicators on the front panel do not light up, then check if the power is turned on by the button on the router (if there is such a button, for example, the TL-WR740N does not have it). Click the "Next" button.

We will see a description of the operation of the TP-LINK router indicators, by which you can determine whether the router is connected correctly, and whether it is working correctly.

At this step, you may face a problem when the router does not see the Internet. The cable that is connected to the WAN connector. There is a separate article on this problem: the router does not see the Internet cable.
Click "Next".
Checking the network adapter and network status will start.
If during this check you see a message that configuration is not possible, and you need to check the connection of the router, then disable the antivirus (or the built-in firewall). I have not completely disabled my Dr.Web yet, then an error appeared when checking the parameters. Perhaps your antivirus will not have such problems.
We are waiting for the verification to complete successfully, and click "Next".

The router installation is complete. The Easy Setup Assistant will proceed to configure the router.
Automatically setting up an Internet connection on a TP-LINK router
Now we need to set the most important settings. Configure our router to work with an Internet provider. Nothing complicated. Just select your country, region, provider, and connection type from the list. It is done something like this:

If you have NOT Dynamic IP, for example PPPoE, L2TP, PPTP, you will need to set another username and password. And also, other information, if necessary. All this data should be given to you by the Internet provider.

If your country, region, or provider is not listed, then check the box next to "I have not found a suitable setting", and configure the settings manually.

All data is provided by the Internet provider.
If your router is connected to an ADSL modem, then in the manual settings select "Dynamic IP-address".
Everything should work.
If the settings are correct, the router will connect to the Internet and proceed to configure the wireless network.
TP-LINK: quick setup of a Wi-Fi network through a program from a disk
A window will appear in which we need to set the name of the Wi-Fi network. Come up with any name. You can even leave the standard (which is already written).

Click "Next", and a window will appear with the security settings for the outbred network. Now we will put a password on Wi-Fi. We leave the selected item "Highest security level (WPA2-PSK)".
We erase the standard password, come up with our own, and write it down. Come up with a good password, not like mine in the screenshot below 🙂 Click on the "Next" button. You can change the wireless password at any time.

A window will appear with the result of configuring our TP-LINK router. There will be information on setting up the connection, the name of the Wi-Fi network, and the password. You can write down the password somewhere, or leave a tick next to the item "Save these settings in a text file on my desktop", and click "Next". A text file will appear on the desktop with the Wi-Fi password.

Again, wait while the Easy Setup Assistant utility saves and verifies the router settings. And click "Next" again.

A window will appear with information on setting up a WPS connection, click "Next".
Then we will see the last window in which you just need to click on the button "Complete"... If you want to enter the settings through a browser, open the control panel, then click on the link "Settings WEB interface".

So, step by step, we configured the router.
Some more useful information
I would also advise you to change the default admin password, which protects the entrance to the settings. This can be done through the control panel, according to this instruction.
After completing the setup, you can disconnect your computer or laptop from the router. It does not have to be wired. You will already be able to connect to your Wi-Fi network. And if you had an Internet connection configured on your computer, then it is no longer needed. This connection will start the router.
Perhaps you still have some questions about this article, leave them in the comments. If you get some kind of error, or something cannot be done, then write in detail at which step you have a problem with the setting.