I am often asked if it is possible to launch an access point and distribute Wi-Fi from a computer whose Wi-Fi adapter is not built-in (like in laptops), but external or internal. Which is connected via USB, or PCI. I wrote about such adapters in this article. As a rule, they buy external USB Wi-Fi adapters for ordinary stationary computers. It is through one of these adapters that today we will configure the access point and start the distribution of the Internet.
I will show using the example of the TP-LINK TL-WN721N adapter. Windows 10 is installed on the computer. I want to say right away that there is no difference between setting up an access point on a stationary computer via a Wi-Fi adapter, or on a laptop. Therefore, you can also configure it according to the instructions: how to distribute Wi-Fi from a laptop to Windows 10. And if you have Windows 7, or Windows 8, then there will be no differences either. The commands for starting the access point will be the same. If anything, here's another tutorial on how to start the access point on Windows 7.
I will launch the hotspot via the command line. And if you want to use special programs to launch an access point, then see the article: Programs for distributing Wi-Fi from a laptop in Windows 10, 8, 7. There I wrote about the most popular programs that can be launched and controlled by the access point. But, I would advise the first time to configure everything with commands through the command line. And if everything works, you can use the program.
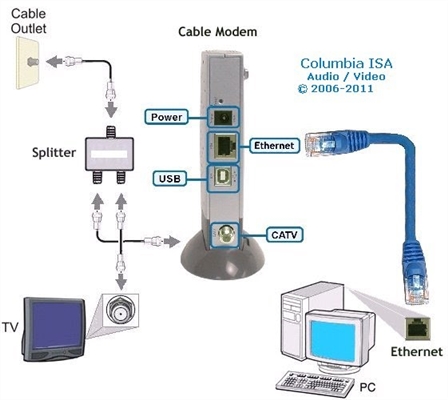
A few words for those who are not quite in the subject. Windows has the ability to launch a virtual access point, and thereby turn a laptop or computer with a Wi-Fi adapter into a router. It will distribute the Internet, which is connected to the computer via a network cable, or via a USB 3G / 4G modem.
Preparing a Wi-Fi adapter to launch an access point
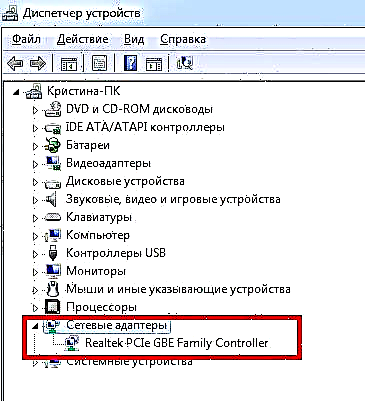
The most important thing is that the computer detects the adapter and installs the driver on it. I think this shouldn't be a problem. The drivers come on the disk with the adapter itself. If they are not there, then you can download the required driver on the adapter manufacturer's website for your model. Even an old adapter like TL-WN721N worked without problems in Windows 10, and I was able to start the access point.
We will not go into all the nuances with the drivers of the virtual adapter, etc. for now. We do not need this yet. It is enough that after connecting the adapter to the computer, it is detected and Wi-Fi works.
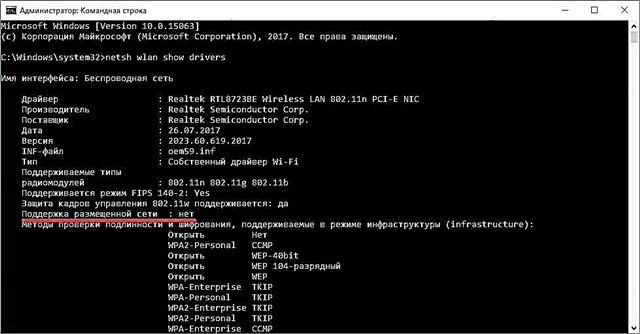
If you want, the commandnetsh wlan show drivers you can check if your wireless adapter supports virtual Wi-Fi network launch. Just run the command on the command line. Find Hosted Network Support in the results. The opposite should be yes.

If there is no support, then update the Wi-Fi adapter driver. If the update doesn't work, then try the tips in this article.
With this sorted out. It remains only to execute a few commands, and you can connect to the wireless network, which will be broadcast by the computer. We continue with the configuration.
Wi-Fi adapter as an access point. Setting up in Windows 10, 8, 7
We will execute the commands on the command line. It must be run as administrator. You can find the command line in the start menu, right-click on it and select "Run as administrator". Alternatively, in Windows 10, you can simply right-click on the start menu and select "Command Prompt (Admin)".

Next, with the first command, we set the name of our Wi-Fi network, and the password for connecting to it. To do this, we need to run the command:
netsh wlan set hostednetwork mode = allow ssid = "help-wifi.com" key = "11111111" keyUsage = persistent
"help-wifi.com" - these are the names of the network that the Wi-Fi adapter will distribute, and "11111111" - this is the password. You can change this data. Password is at least 8 characters.
We copy this command to the command line, and execute it. The following result should appear:

With the next command, we start the access point. To do this, run the command:
netsh wlan start hostednetwork
The report "Hosted network started" should appear:

This means that the Wi-Fi network is already broadcast, and you can connect your devices to it using the password that was specified in the first command.
We launched the access point, you can already connect to the Wi-Fi network. But, the Internet on devices will not work yet. You need to open public access in the properties of your Internet connection. What we will do now.
We open the general access to the Internet for the Wi-Fi access point
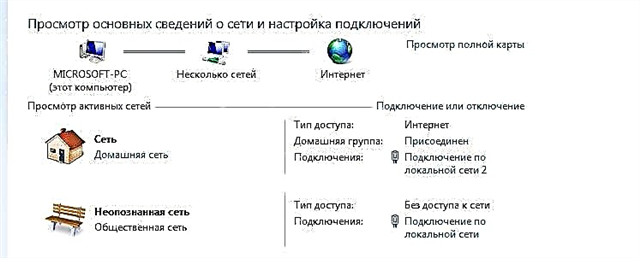
Go to the "Network and Sharing Center", and go to "Change adapter settings".

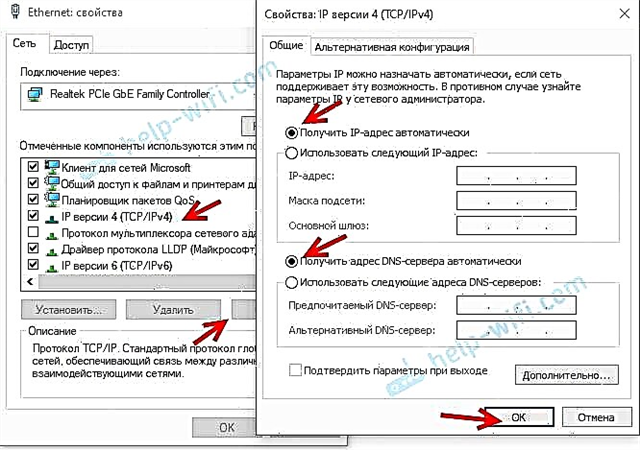
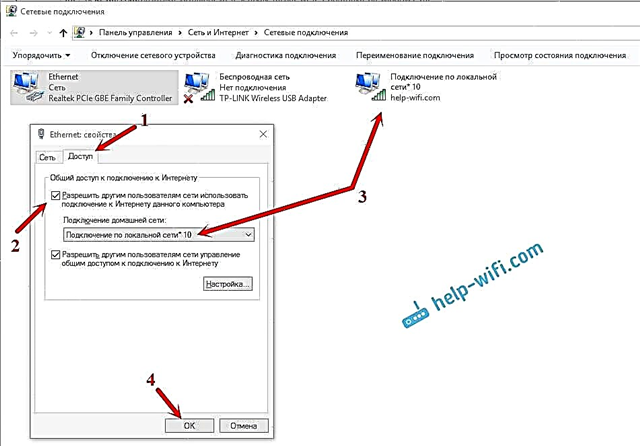
Now the important point: open the properties of the adapter through which you have an Internet connection. It does not have to be an Ethernet adapter or a Local Area Connection. There may be a connection with the name of your ISP. Right-click on it and select Properties.

Go to the "Access" tab, put a tick next to the item "Allow other network users to use the Internet connection of this computer." And from the list select "Local Area Connection *" (you may have it with a different number). Click Ok.

The Internet should work on devices. If it does not work, then stop the network with the commandnetsh wlan stop hostednetwork, and restart it with the command netsh wlan start hostednetwork.
After restarting the computer, you will need to start the network each time with the netsh wlan start hostednetwork command. Or, make the hotspot start automatically in Windows.
Solving popular problems and mistakes
- Error "The hosted network could not be started. The group or resource is not in the correct state to perform the requested operation." I will not re-describe the reasons for its occurrence and solutions, but I will simply give a link to a separate article: https://help-wifi.com/nastrojka-virtualnoj-wi-fi-seti/ne-poluchaetsya-razdat-wi-fi-s- noutbuka-na-windows-7-windows-10-8 /. In it, I wrote about solving this problem.
- Devices do not connect to a running access point. If possible, try connecting another device. Make sure you enter the password correctly. Typically, antivirus or firewall software is to blame for this problem. Disable them. You can also try disabling the Windows built-in firewall.
- The Internet works. It often happens that devices connect to Wi-Fi, but there is no Internet access. The first step is to make sure the internet is working on your computer. Then, check your sharing settings. Let me remind you that you need to open public access in the properties of the connection through which you have an Internet connection.
- In any situation, restart your computer, and start the access point again using the netsh wlan start hostednetwork command.
The setup process itself is not complicated. But, often incomprehensible problems appear. The equipment, adapters, and internet connections are different for everyone. Therefore, certain nuances may arise. If you failed to start the access point, then describe your case in the comments. Let's solve the problem together.