Most TP-Link router models have a USB port. It is used to connect USB drives, printers, and USB modems (on some models). Today I will show you how to connect a USB flash drive or an external hard drive to a router, and without complicated settings, get access to a USB drive over the network from almost any device. Simply put, from a computer, or even a mobile device (Android), we can access a USB flash drive that is connected to a TP-Link router. The drive can be accessed by devices that are connected both via Wi-Fi and a network cable. It will be possible not only to view files on the drive, but also to write and delete.
Earlier, I already wrote an article on setting up FTP on TP-Link routers. This is also a good way to get access to the drive that is connected to the router, but there are more complex settings. And we will configure normal network access, and connect the network drive in Windows so that you can easily access the USB flash drive.
If you want to watch the files on the TV that are on a USB drive connected to the router, then it is better to set up a DLNA server. I wrote how to do this on a TP-Link router in a separate article: https://help-wifi.com/raznye-sovety-po-tv/media-server-dlna-na-wi-fi-routere-asus-i- tp-link /.
And also, a USB flash drive connected to the router can be used to download files offline. If your router model has such a function.
Setting up network access to a USB flash drive through a TP-Link router
Most likely, you won't have to make any settings on the router at all. If there are factory settings, you have not changed the USB settings, then sharing is enabled by default.
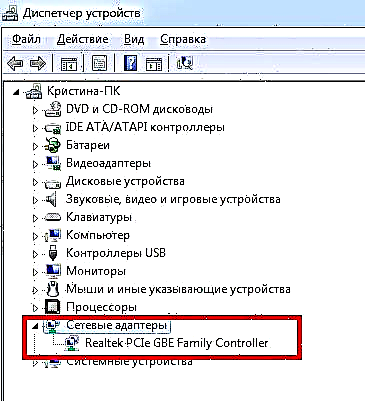
At the moment, there are routers on the market with the old control panel (which is green) and the new one (blue). As far as I understand, on older models there is no access to the drive through the "Network Neighborhood". This means that the drive connected to the router will not automatically appear on the Network tab in Windows Explorer. You will need to add it manually.
We'll start with the simplest setup and look at different nuances.
We connect the USB disk to the router
First, plug the drive into the USB port of your router. It can be a regular flash drive, or an external hard drive.
I do not recommend connecting a drive that contains important information. Since there is always a risk of losing it. It is better to practice on a blank storage device, or on which there is no valuable information. Also, don't change the settings when you don't know what they mean.
I checked everything on the Tp-Link Archer C20i router. You can of course have a different model, that's okay.

I think there shouldn't be any problems with the connection.
Accessing USB storage from a computer (Windows 10) via TP-Link router
I'll show you using Windows 10 as an example. But in Windows 8 and Windows 7 everything will be exactly the same.
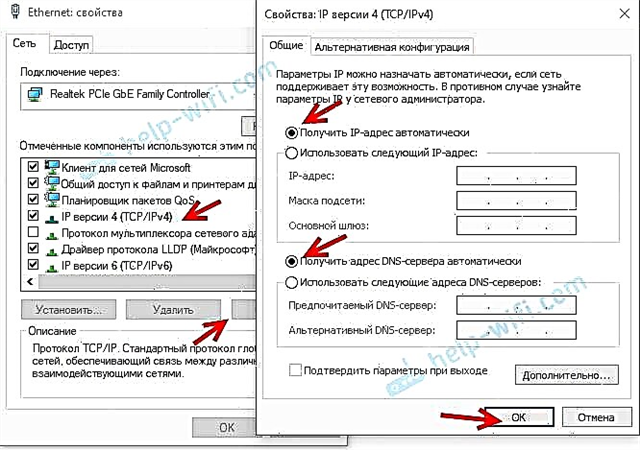
The computer is connected to a router to which, in turn, the drive is connected. First of all, let's check if our drive is already displayed on the "Network" tab in Explorer.
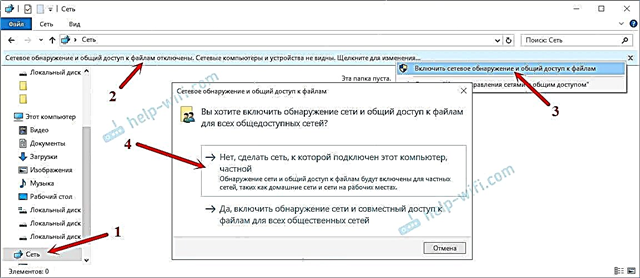
Open File Explorer and go to the Networking tab. If a message pops up from above that "Network discovery and file sharing is disabled," then click on it and select "Turn on file discovery and sharing." If another window appears, then I advise you to open access to the network to which you are connected at the moment. If the message does not appear, then it's okay, then everything is Ok.

Let's see what is there in this window. If you're lucky, the network access to our router will be displayed there. I call it "TP-SHARE". We open it, there will be a folder in which the contents of our drive are already located.
The screenshot is already from Windows 7, it was too lazy to boot back into Windows 10 :) But everything is the same there.

That's all. You can upload files there and read them. But this method worked for me only with the new TP-Link Archer C1200 router. But the drive connected to the Tp-Link Archer C20i was not displayed on the network tab. But it can be connected as a network drive without any problems.
If the NAS does not appear on the Network tab
In this case, just open the explorer, and go to the address\192.168.0.1, or\192.168.1.1 (it all depends on the router). Our flash drive, or HDD, should open immediately.

In order not to enter this address in Explorer every time, just right-click on the folder with the drive and select "Map network drive ...".

In the next window, just click "Finish".

That's all, now our disk will always be accessible from Explorer (This computer).

After disconnecting the flash drive from the TP-Link router, and reconnecting, even the router does not need to be rebooted. Access will be restored automatically.
Configuring USB Sharing on TP-Link Routers
As you can see, everything works without any router settings. We didn't even need to log into the control panel. But I still decided to show the sharing settings. There you can disable anonymous access. This is when you need to enter your account username and password to access the drive. You can create accounts with different access rights. For example, only with read rights (view files).
I already wrote above that TP-Link routers come with two control panels: green and blue. Let's consider both options.
You need to go to the router settings. It is enough to go to the address in the browser 192.168.0.1, or 192.168.1.1 and provide your login information. Factory: admin and admin. You can see detailed instructions: https://help-wifi.com/tp-link/kak-zajti-v-nastrojki-routera-tp-link/.
If you have a green control panel, then you need to open the tab "USB Settings" - "Sharing".

As you can see, the server is enabled by default. To configure access settings, create new accounts, uncheck the "Anonymous access to all volumes" checkbox. You can also disable access by clicking on the appropriate button.
On new routers with a new control panel, in the "Additional settings" section, open the "USB Settings" - "Sharing" tab. We accessed through Network Neighborhood. As you can see, it can be turned off by simply unchecking the box next to it.

That's all. If you are interested in accessing files that are on the drive connected to the router from a phone or tablet on Android, then I recommend using the ES File Explorer app. It has a network tab where the NAS will be displayed. If it does not appear automatically, then there is an option to connect a network drive to the address 192.168.0.1, or 192.168.1.1.
If you can't log in from a mobile device, then write in the comments. I'll show you in more detail.