If you have an ASUS router, or TP-LINK with a USB port, what is most likely? it has the ability to launch a media server, and provide access to videos, photos and music for a TV that supports DLNA. You can run a DLNA server not only on TP-LINK and ASUS routers, but in this article I will show you using the example of devices from these manufacturers.
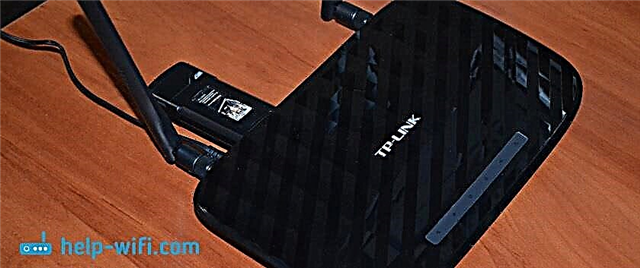
Let's first figure out how it works. We have a router with a USB port, the ability to run a media server (if there is USB, then most likely there is also support for DLNA Media Server). We have a TV connected to this router, in my case this is a Philips TV on Android TV. Again, the TV can be anything: Samsung, LG, SONY, etc.
We connect a storage device (USB flash drive, or external hard drive) to the router, which contains movies, music, photos. Then, in the settings of the router, we start the media server. And on the TV we can watch those files that are on the drive connected to the router. Moreover, if the TV is connected via Wi-Fi, then all this is wireless, over the air. And we can still access this drive from a computer that is also connected to the router, and we can copy new films to it, or download them directly from the Internet to the drive.
And if you want to run a DLNA server on your computer and watch files on your TV, then you need these instructions:
- How to watch movies from a computer on an LG TV (via wi-fi, or a network)? DLNA setup via Smart Share
- DLNA server setup for Philips TV. Watching movies from a computer on TV
Convenient scheme, agree. We will now take a closer look at the configuration process on both routers. First, I will show you how to start a media server on a router, then go to it from the TV, and get more access to the drive from the computer in order to add new files, and not disconnect the USB flash drive from the router all the time.
Setting up a media server on ASUS Wi-Fi router
First of all, plug the storage device you want to access from the TV into the USB port of the router.
Then, go to the settings of our ASUS router by simply opening the address 192.168.1.1 in the browser. Provide a username and password (by default, these are: admin and admin). If anything, there is a detailed instruction, you can see it here.
In the control panel, go to the "USB application" section, and select "File / Media Server".

On the "Media Server" tab, opposite the "Enable DLNA Media Server" item, set the switch to ON... Thus, we turn on the DLNA server. You can, if you wish, change the name of the server, and choose whether to share the entire disk, or only certain folders (by default, all). But, these functions are unlikely to come in handy. Click on the "Apply" button.

There is still the option to run iTunes Server. I take it this is for Apple TV.
All the server is running, and the TV should already see it. But, we still need access to the drive from a computer, or even from a smartphone (Android). Therefore, go to the "Network Neighborhood (Samba) / Cloud Disk" tab in the same window, and set the switch to ON opposite "Allow shared access to the resource". Save your settings.

Now, on the computer, in the explorer on the "Network" tab, there will be a drive that is connected to the ASUS router. I will write about this in more detail below. You can already turn on the TV, launch DLNA, Smart Share, Media, etc. there, and watch movies, photos, or listen to music that is on the drive.
If any questions remain unclear, you can also look at a separate article on setting up file sharing on ASUS routers.
Media server (DLNA) for TV on TP-LINK router
In the same way, the first thing we do is connect our USB flash drive or external HDD to the router. We go to the settings of the TP-LINK router. The address to enter the settings, and the factory username and password, see the sticker on the bottom of the router. And if you can't go into the settings, then here's a detailed instruction specifically for TP-LINK.
In the settings, go to the tab "USB Settings" - "Media Server". On this page, we need to start the server itself, you can change its name, click on the "Scan Now" button so that the router finds all the files on the drive, and if necessary, set an automatic scan every few hours.
Click the "Save" button to save the settings.

Everything, the server is running. We check if the shared access to the drive is enabled so that computers and smartphones can see it. To do this, go to the "Storage Sharing" tab. It must be running (in the Enabled status).

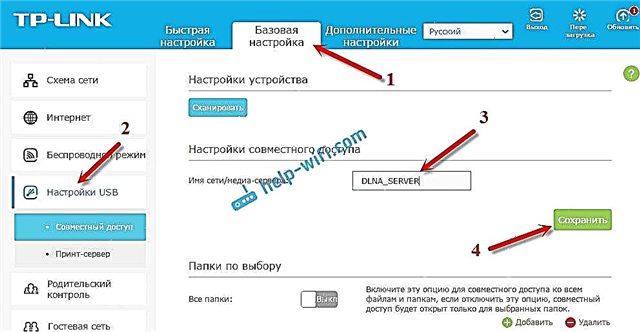
If you have a TP-LINK router with a new (blue) control panel
In the new version of the web interface from TP-LINK, you need to open the "Basic setup" section, then "USB settings" - "Shared access", specify the "network / media server name", and click the "Save" button. Both Sharing and DLNA Server will start. You can also specify the folders that you want to share on the TV. But, this is optional.

It's that simple.
Viewing files on a TV from a DLNA server (on a router)
It all depends on your TV. Most likely, in the Smart TV menu itself, you need to launch a certain program. In LG, for example, this is Smart Share. For me, on Philips (Android TV), this is the "Media" program, or the SOURCES button, and the "Network" item. It's not hard to find it on your TV menu.
There you should see a DLNA server with the name that we set during the setup process. Or, the name will be standard.

You can browse the folders that are on the drive, or go to one of three folders: Music, Pictures, Videos, where all files of a certain format that were found on the USB drive are collected.
Sharing the Drive from Your Computer
If you want to add new files to your media server, you can go to the drive from your computer (via Wi-Fi) so as not to turn it off. Provided that your computer is connected to the same router. During the configuration process, we opened public access in the router settings.
In the case of the ASUS router, on the network tab, I immediately got a network device, opening which we get access to the USB flash drive. You may need to provide a username and password. This is the same data that you specify when entering the router settings.

And having enabled general access on the TP-LINK router, for some reason the device did not appear for me. But, it can be accessed at \192.168.0.1 (could be 192.168.1.1). We just enter it in the explorer.

There is another way. Configure an FTP server on the router, and manage files through it. If it is more convenient for you, then see the separate instructions:
- Configuring an FTP server on a TP-LINK router
- Setting up an FTP server on an ASUS router. Access to a USB flash drive through a router
Now we have access to the files that are on the USB drive, which in turn is connected to the router itself. Moreover, there is access both from a computer or phone, and from a TV, using DLNA technology.
How do you use the USB port on the router? Share your tips in the comments, and of course ask questions. Good luck!