Tenda has many models of routers with USB port (AC9, AC10U, AC15, 4G630, AC18, D301). The presence of a USB port makes it possible to connect a regular USB flash drive or an external hard disk drive (HDD) to the router and set up general access to this drive from all devices in the home network. You can configure both an FTP server and regular network access to the drive (Samba). You can access your NAS from almost any device. From computers on Windows, Mac OS and mobile devices on Android - no problem at all. Unfortunately, for some reason I did not find DLAN support in the AC10U settings. Most likely this function is not supported on this router. With it, you can easily organize access to photos, videos and music for your TV (which supports DLNA). The AC15 model, for example, has DLNA support.
There are not many settings related to the File Sharing function on Tenda routers. But there is everything you need and everything is very simply organized. It is possible to change the access rights to the drive for the "Guest" user. Either read only files, or read and write. For example, only you may be able to copy new files to the drive, modify them, and delete them. And other users will only be able to view them.
In any case, we first need to connect a USB stick or external hard drive to the Tenda router. I will use a regular USB stick. My router is Tenda AC10U. This particular model supports HDD up to 2 TB. I have not tested, so the manufacturer says. We connect our drive to the USB port of the Tenda router.
An indicator with the USB icon (if any) on the router should light up. The drive is connected, you can proceed to the setup.
Setting up file sharing (FTP and Samba) on a Tenda router
Go to the router settings at http://tendawifi.com. If you do not know how to do this, or it does not work out, then see this instruction.
The USB drive should be displayed on the main page of the web interface.

If you click on it, you can see the volume of the drive and how much memory is available. You can also disable it there, or go directly to the USB Application Center.

Basically, file sharing works already. To see the settings and address for accessing the network storage, you need to go to the "USB application" section and select "File Sharing".
There are three blocks with settings:
- FTP server. Settings: encoding type - it's better not to change anything unnecessarily. Allow Internet access - you can enable access to your FTP server over the Internet. But for this feature to work, you must have a white, static, external IP address. I have not tested this function. LAN IP is the IP address of our local FTP server. This address can be used to access the server. For example, through a browser.
- Samba server. There are no settings here, just an address for accessing the NAS for Windows and Mac OS. It must be typed in the explorer. Or connect as a network drive. I will discuss this in more detail below in the article.
- User settings. By default, two users have already been created there: administrator and guest. They have different access rights to the drive. The administrator has read / write permissions, and the guest has read only. The default administrator username is admin. The password is also admin. You can change the password. Also, if necessary, you can change the username and password for the "Guest" account.

Everything is as simple and clear as possible. I recommend only changing the administrator password.
How do I use FTP to access my drive?
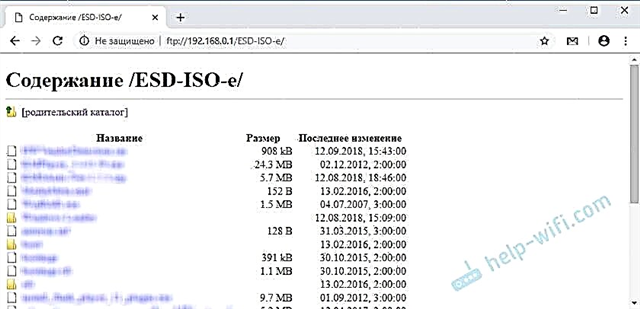
Just go to ftp://192.168.0.1:21 in the browser. A login and password request will appear. To log in with an administrator account, you need to enter the appropriate username and password.

This is how the files on the drive are displayed:

You can use separate programs to access files. For example FileZilla Client. For Android, there is a handy ES File Explorer app. It has the ability to connect via FTP.
Configuring access to the Samba server
A hard disk or USB flash drive connected to the Tenda router can be opened like a normal folder. To do this, in Windows Explorer, you just need to go to the address: \192.168.0.1... If you have a Mac OS computer, the address will be like this: smb: //192.168.0.1.
For authorization, enter the login and password of the required account, which are specified in the settings of the Tenda router.

Our drive will open.

You can view files, delete them, copy new ones, etc. But this depends on the rights that are assigned to the account under which you logged into the drive. Don't forget this.
To avoid typing this address each time, right-click on the drive and select "Map network drive".

In the next window, you can simply click on the "Finish" button.

Now the network drive will always be displayed in the This PC folder.

From mobile devices on Android, access to the NAS can be obtained through the same ES Explorer application. If it doesn't work out - write in the comments. I'll show you how to do it.