All the articles in which I talked about how to set up the distribution of the Internet via Wi-Fi from a laptop or PC collect a lot of views and comments. This means that people use this function in Windows. Many people use their computer instead of a router. Yes, it works. It is enough to launch the command line, execute a few commands, set up Internet sharing and the laptop will start distributing Wi-Fi, to which you can connect your mobile devices, other computers, etc. Not everyone is able to launch a virtual network through the command line. And if you manage to configure everything, then this network does not always work stably. You need to understand that this is Windows, and this is just one of the functions, the operation of which depends on hardware, drivers, some kind of network settings, services, etc.
I always advise you to configure your virtual Wi-Fi network through the command line. With the help of special commands, which I will discuss in this article. The only exception is the built-in Mobile Hotspot feature, which is only available in Windows 10, and which also cannot always be configured. If you have Windows 10 installed, then try sharing Wi-Fi through the Mobile Hotspot first. If it does not work, go back to this instruction and perform the configuration via the command line. Or see the detailed instructions in which I showed you how to set up Wi-Fi distribution in Windows 10.
Command Prompt is a one-stop solution for all versions of Windows. Using the command line, you can launch a virtual Wi-Fi network in Windows 10, Windows 8 and Windows 7 (except for the Starter version). There are many programs that allow you to start up and manage your network through a graphical interface. I wrote about these programs here. But these programs are a simple shell, and they execute the same commands that we can manually execute. And if some error appears during the setup process, then at least we will see it and be able to find a solution.
Commands for distributing Wi-Fi and managing a virtual network in Windows
In this article, I will definitely show you how to properly use the command line to launch virtual Wi-Fi. But first, I want to talk about the commands that we will use to configure, start, stop and control the wireless network that our laptop or desktop computer will broadcast.
These commands must be executed from a command line running as administrator. Or in PowerShell.
It is very difficult and time-consuming to enter these commands manually. Therefore, you can copy them directly from this article and paste them into the command line (Ctrl + V, or simply by right-clicking).
Launch a virtual Wi-Fi network in Windows via the command line
First you need to run the command line. You can use a universal solution that works in Windows 7, Windows 8 and Windows 10: press the keyboard shortcut Win + R and execute the command cmd.exe.
If you run through the "Start" menu, or through a squeak in Windows 10, then right-click on the icon and select "Run as administrator".

Let me remind you that you can use PowerShell. You also need to run this shell as administrator. To run it on Windows 10, right-click on the Start menu and select Windows PowerShell (Admin).
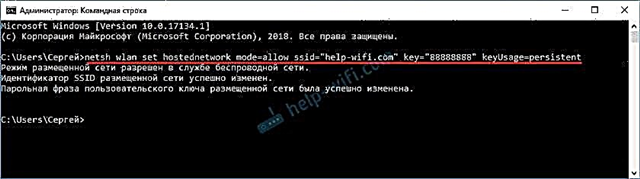
1First we need to set the network parameters. Set the Wi-Fi network name and password that will protect this network. Windows cannot distribute an open Wi-Fi network without a password. You only need to do this once. Or when changing the network name and / or password.Copy the command, paste it into the command line and press Enter.
netsh wlan set hostednetwork mode = allow ssid = "help-wifi.com" key = "88888888" keyUsage = persistent
help-wifi.com is the network name (SSID). 88888888 - password (key). If you want, you can change the name and / or password before running the command. The password must be at least eight characters long.

We see a message that the hosted network mode is allowed in the wireless network service. SSID (network name) and passphrase changed successfully. If, for example, you want to change the network name or password, then we simply change them in the command and execute it again. The new parameters will be set.
netsh wlan start hostednetwork
If everything is ok, the "Hosted network started" message should appear.

After running this command, the error "Failed to start the hosted network" often appears and, accordingly, nothing works. I talked about the solution in a separate article: I could not start the hosted network on Windows.
Our laptop or stationary computer is already distributing a Wi-Fi network. But, since we did not set the Internet Connection Sharing settings, this is a network without Internet access. This means that after connecting to it, the devices will not have access to the Internet. I wrote about this problem here. We will fix this now.
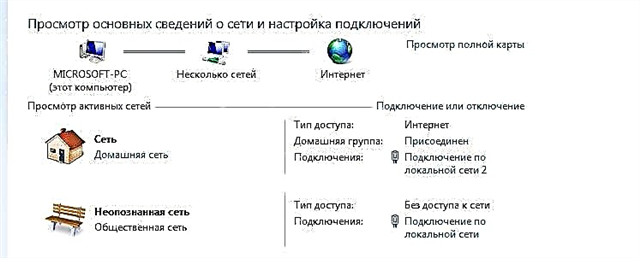
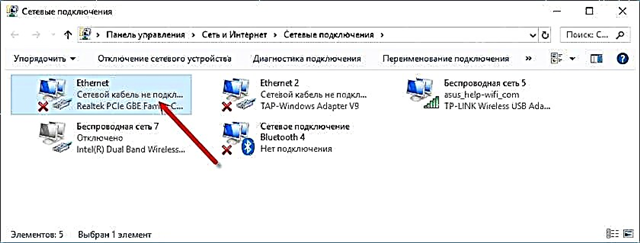
3In the properties of the Internet connection (through which our computer is connected to the Internet), you need to allow general access to the Internet for the connection that appeared after starting the virtual Wi-Fi network through the command line.Open the "Network Connections" window. We see that we have a new connection with a number at the end of the name. And with the name of our Wi-Fi network, which is distributed by the computer.

We need to share it with him. We do this (see the screenshot below):
- Right-click on the adapter through which the Internet is connected. It can be a LAN connection, Ethernet, ISP connection (high speed), mobile modem connection - it doesn't matter.
- Open "Properties".
- Go to the "Access" tab. If you do not have the Access tab, see the article Cannot share the Internet over Wi-Fi in Windows 10.
- We put a tick next to "Allow other network users to use this computer's Internet connection."
- From the list of home network connections, select the connection that appeared after starting the distribution of the Internet through the command line. Usually, this is a connection with some kind of number at the end. I have this "Local Area Connection * 59".
- Click "Ok".

After that, the devices that you connect (or have already connected to the Wi-Fi network that the computer distributes) should have access to the Internet.
"Public" will appear next to the Internet connection. If you open the "Status" of the created connection, then next to "IPv4 connection" should be written "Internet". Before setting up sharing, there is "No network access". Don't pay attention to IPv6.

If the devices connect to the network, but there is no access to the Internet, then stop the distribution of Wi-Fi via the command line and start it again (see below, step 4).
There are times when devices cannot connect to the Wi-Fi network that we launched in Windows settings. Solutions can be found here: devices do not connect to the access point in Windows 10. Obtaining an IP address.
4As you already understood, after opening the general access to the Internet, the Internet does not always appear on the devices themselves. You need to either stop the distribution with a specific command and start it again, or restart the computer and start the Wi-Fi distribution. If it doesn't work, check the sharing settings.To disable the virtual Wi-Fi network, run the following command:
netsh wlan stop hostednetwork
The hosted network has stopped. The computer will stop distributing the Internet via W-Fi.

Well, and accordingly, to restart, use the command:
netsh wlan start hostednetwork
The hosted network is up and running.

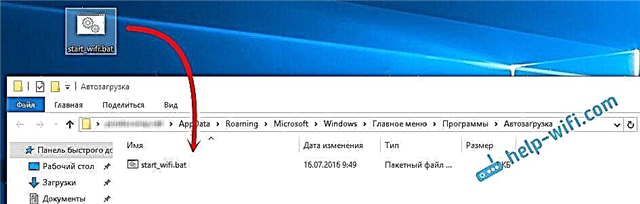
Basically, we only need these two commands. And since the distribution automatically stops after restarting Windows, then in general there is one command - to start. For instructions on setting up automatic network startup, or using a file (so that you do not copy commands every time and execute them on the command line), you can see the link that I left above in this article.
Additional Information
Since this is a very capricious function, and a lot of its work and setup process depends on the version of Windows, Internet connection, device (laptop, or PC), I will leave a few more links to more detailed instructions:
- If you have a laptop or computer with Windows 7 installed - https://help-wifi.com/nastrojka-virtualnoj-wi-fi-seti/kak-razdat-internet-po-wi-fi-s-noutbuka-na-windows -7-nastrojka-cherez-komandnuyu-stroku-2 /
- If the Internet is connected not by cable, but via USB 3G / 4G modem - https://help-wifi.com/nastrojka-virtualnoj-wi-fi-seti/kak-razdat-wi-fi-esli-internet-cherez-usb -modem-3g4g /
- If you want to distribute the Internet from a stationary computer via a Wi-Fi adapter - https://help-wifi.com/nastrojka-virtualnoj-wi-fi-seti/nastrojka-tochki-dostupa-cherez-wi-fi-adapter-na- pk-s-windows-10 /
As you can see, using commands to distribute the Internet over Wi-Fi is not at all difficult. You just need to run a few commands in the Windows command line and you're done. If it doesn't work, ask in the comments. I am always in touch. While!