Finally, I figured out the wireless display function in Windows 10. I connected and tested everything for half a day to prepare an article with verified information for you. And of course, with photos and screenshots.
There are two main technologies: Miracast and Intel WiDi (Intel has discontinued the development of this technology), with which you can display images and sound from a computer, laptop or mobile device over Wi-Fi. Simply put, use your TV (projector, monitor) as a wireless display. The trick is that with the help of these technologies you can not just display a movie or photo on the screen (as is the case with DLNA), but broadcast everything that happens on the main computer monitor or laptop screen.

A wireless display, which is most often a TV, works as if it were connected via an HDMI cable. You can duplicate the image, expand the screen, and more, all without wires. There are also monitors with Miracast support.
The Wireless Display feature in Windows 10 displays images using Miracast technology. But, for some reason, when connected, the TV had an inscription "Intel's WiDi". As it turned out (read on the Intel website), they stopped developing and supporting Intel® WiDi technology. And they report that Windows 8.1 and Windows 10 already initially have support for Miracast, which can be used to connect wireless displays without additional programs.
For everything to work, there must be support for Miracast at the hardware and driver level. The Wi-Fi adapter that is built into your laptop or connected to your PC must support the wireless display function. Also, the video adapter should have such support.
I tested on such equipment:
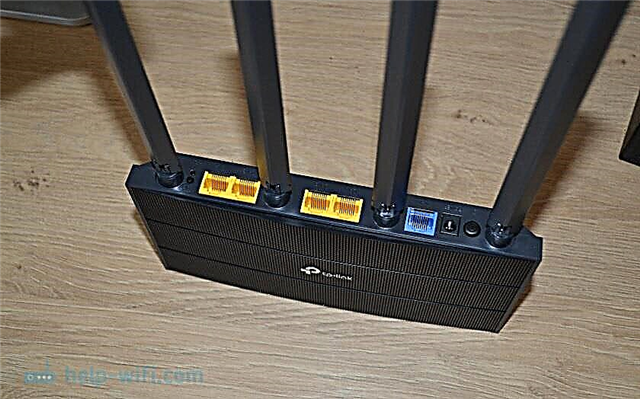
- PC with Intel Core i3-6098P processor and GeForce GTX 750Ti graphics card. Wi-Fi adapter TP-Link TL-WN725N V2.
- Laptop with old 3rd generation Intel Core i3 processor and integrated Intel HD Graphics 4000 video. NVIDIA GeForce GT 635M graphics card. Wi-Fi adapter the same TP-Link TL-WN725N V2. Since the adapter built into the laptop does not work.
- I used an LG TV as a wireless display. The model is still 2012, but with support for Miracast and Intel WiDi. As it turned out, the new and sophisticated Philips TV does not have built-in support for Miracast. If your TV also does not support this technology, then you can use the Miracast adapter.
This connection works without a router, directly. It is not necessary to connect your computer (laptop) and TV to the same router.
In this article, I will first show you how to enable Miracast in Windows 10 and how to connect to a wireless display. Then, we will consider solutions to possible problems and errors.
Connecting to a wireless display (TV) in Windows 10 via Miracast
Press the keyboard shortcut Win + P (English). A window should appear on the right with different options for displaying the image. And there should be a "Connecting to a wireless display" item. Click on it. If there is no such item, then most likely your hardware or driver does not support this function. At the end of the article I will write about this in more detail and show you how to check.

The search starts for wireless displays and audio devices.
Most likely, you need to enable the Miracast / Intel WiDi function on your TV. In older LG models, this is done in the menu under "Network". Like this:

On newer LG models, most likely these settings look different. On Samsung TVs, select "Screen Mirroring" from the source selection menu (perhaps not on all models). On TV from Sony - "Screen mirroring" in signal sources (separate button on the remote control). On Philips TVs: under "Settings" - "Network Settings" - "Wi-Fi Miracast". But on mine, which with Android TV, there is no such item.
If your TV does not have built-in Miracast support, you can buy a separate Miracast (Mirascreen) adapter. It connects to the HDMI port of the TV. Receives picture and sound and outputs it to TV.
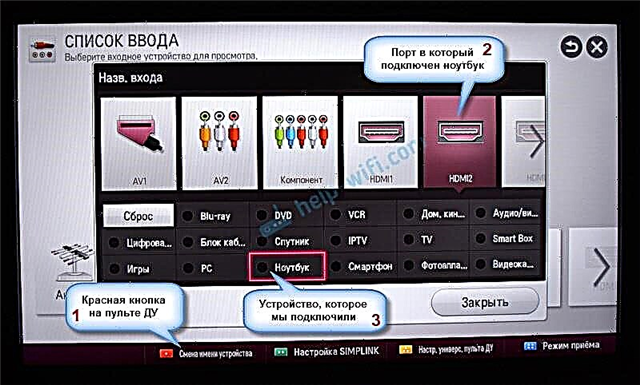
The TV should appear in the search results. Just select it and the connection process will go.

There will be an inscription "Follow the instructions on the device screen." In my case, on the TV, you need to confirm the connection of the computer.

Everything is ready!

If you fail to connect the first time, don't give up. Try again. Reboot your devices. Something didn't work out the first time.
You can change the projection mode. For example, expand the screens, or use only the second one (a TV that is connected via Miracast). Or duplicate the image on both screens.

You can also disconnect from the wireless display there.
Connection by adding a new device in the parameters
There is another way. In the options go to the "Devices" section and select "Add Bluetooth or other device". Then tap on "Wireless Display or Dock".

Turn on Mirakast on your TV and it should appear on the list. Choose your TV and establish a connection.

Maybe this method is more suitable for someone.
Audio control when connected via Miracast
Like HDMI cable, Miracast also transmits sound. At me, right after connection, the sound from the computer was output through the TV speakers. The default device was "Digital Output". And this is not always convenient. Therefore, in order for the sound of the player through the laptop speakers, or speakers, you just need to change the default playback device.

After that, the sound will be played through the computer speakers. If necessary, you can make "Digital Output" back the default device.
Miracast does not work and there is no "Connect to a wireless display" item
In older versions of Windows 10, when the system "realized" that there was no Miracast support, the message "PC or mobile device does not support Miracast, so wireless projection from it is not possible" was displayed.
In newer versions, there is simply no "Connect to a wireless display" item in the "Project" menu, which opens with the Win + P keyboard shortcut.

Most likely, there is no Miracast support at the Wi-Fi adapter level. Here, for example, through the built-in Wi-Fi module in a laptop, there is no way to connect to a wireless display. The laptop, however, is not new. Somewhere in 2012-13. And after connecting the TP-Link TL-WN725N V2 Wi-Fi adapter, everything works.
For this feature to work, you need support on the side of the Wi-Fi adapter and graphics adapter (video card). Both at the hardware level and at the driver level. It's easy to check.
Start Command Prompt and run the commandnetsh wlan show driver.
The results will contain the line"Wireless Display Supported:" With the factory (old) Wi-Fi module on the laptop, I have the following result:

As you can see, there is no support. Graphics driver supports, but Wi-Fi does not.
And here is the result of the test with another Wi-Fi adapter:

And with this configuration, everything works fine.
What can be done:
- Update the Wi-Fi adapter driver. Unlikely, but it will suddenly work. Here's the instruction: updating (installing) the driver on Wi-Fi in Windows 10.
- If, according to the results of the check, the problem is only in Wi-Fi, then you can replace the Wi-Fi adapter itself. But I noticed that the specifications simply do not indicate whether there is support for a wireless display or not. Everything works on TP-Link TL-WN725N of the second hardware version (V2). But I'm sure there are plenty of other adapters out there that support Miracast. Need to find.
- It may be easier for you to connect your TV via HDMI cable.
Let's consider another problem.
Failed to connect to wireless display
The computer finds the TV, select it, the connection takes a long time and the error "Failed to connect" appears. Or the computer does not see the TV and it does not appear in the list of available devices.

I also got this error several times. It's hard to say what this is connected with. Be sure to try connecting again.
- Restart your computer and unplug the TV for a couple of minutes.
- Perhaps this is due to a bad signal. If possible, reduce the distance between the computer and the TV. Check if the Miracast function (or something like that) is active on the TV.
- Update your Wi-Fi adapter driver. I gave a link to the instruction above.
- If possible, try connecting to another TV that can also function as a wireless display.
Update: Eugene shared a solution in the comments, which, as it turned out, helped not only him. The problem was as follows: the computer found the TV, as shown in the instructions above. But when I tried to connect, the screen blinked on the TV and an error appeared: "The connection request from ... failed. You can try again from your mobile device."
Disabling the discrete video card in the device manager helped. I don’t know if this is the right decision, because we are essentially disabling the efficient video adapter. But it looks like it works. You can try. We go into the device manager and turn off the discrete video card, leaving the integrated one to work.

Don't forget to turn it back on later. When you stop using the wireless display, or it turns out that this solution did not help in your case.
Update: disable antivirus and firewall
There have already been several comments that Miracast in Windows 10 started working after disabling antivirus or firewall.

Try disabling your antivirus for a while. You can also try disabling Windows Defender Firewall. If you know what rule in the firewall settings blocks the operation of the wireless display and how to add it to the exceptions, please write in the comments.
I spent a lot of time and effort on this article. Hopefully not in vain. If you have something to add, or want to ask a question, then I'm waiting for you in the comments. Good luck!