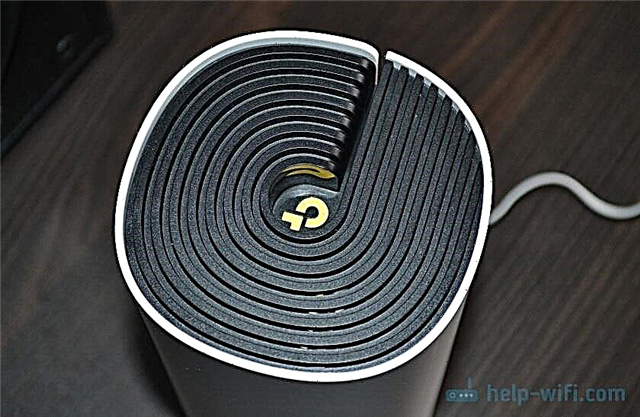
In this article, we will be doing a complete setup of a Tenda router. Whose model is Tenda N3 (follow the link to see reviews, review and characteristics of the model). At first glance, it may seem that it is very difficult to configure the Tenda N3 router. This is all due to the fact that the control panel of this router is in English (there seems to be no Russian firmware). In fact, everything is very simple.

Tenda N3 is an interesting router in all respects. It is very small and unusual. It only has one LAN port. This means that by cable, you can only connect one device (computer, TV, etc.). It lacks a lot of the features you might find in more expensive routers. Tenda N3 is a truly budget router that is suitable for connecting multiple devices to the Internet. If this router is heavily loaded, then it will most likely just shut down, and you will need to reboot it. But, such unstable operation of the Wi-Fi network (under load) on the Tenda N3 is not a minus of this router, but a manifestation of its low price. You can read more about it at the link above. You can also leave your review about Tenda N3 there, because you will most likely already use it. Or you will use it after setup.
This article will guide you to fully configure your Tenda N3 router. I will show you how to quickly configure the device, and if this is not enough for you, then we will analyze all the nuances, such as:
- Connection via cable, or to a new Wi-Fi network
- Entering the router settings
- Configuring connection to a WAN provider
- Setting up a Wi-Fi network on Tenda N3
- Setting (changing password) for a wireless network
- Setting up a local network on Tenda N3
- Port forwarding
- Change the password for entering the settings.
Connecting to Tenda N3 router
You can configure the router either by cable (through a computer, laptop) or by Wi-Fi from the same laptop, phone, tablet. If possible, I would advise you to do the setup by cable. But, as far as I know, there are times when Tenda N3 does not come with a network cable.
Connect the power to the router, then blue WAN connector connect a cable from an Internet provider, or from an ADSL modem. And into the yellow LAN connector, connect the network cable, which will connect the router to the computer (if you will not configure via Wi-Fi).
 Wi-Fi connection
If you still configure over a wireless network, then the device from which you will make the settings must be connected to Wi-Fi with a standard name "Tenda_six digits"... The network will appear immediately after connecting power to the router.
 The network will be without a password. We just choose to connect, and if another window appears with a proposal to establish a network, then click on the link "Connect to the network without ...".
If possible, it is best to configure the router from the computer to which the Internet was previously connected. If the provider makes a binding by MAC address, it will be much easier to configure.
The connection to the router must be established, you can go to the settings.
Login to the control panel, and quick setup of Tenda N3
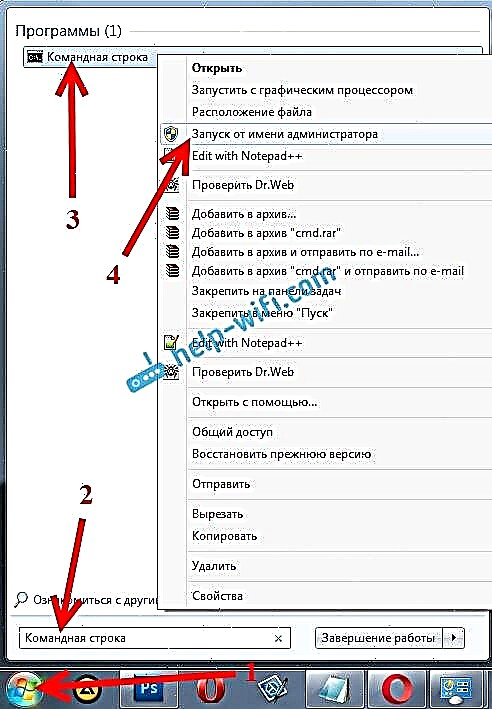
It is very easy to enter the settings of the Tenda router. In the browser, type the IP address of the router 192.168.0.1 and go over it. Settings should open immediately. If a login and password request appears, then enter the login admin, and leave the password field not filled... If you have problems, you can look at the general article on entering the router settings, or a special article for Tenda devices.
You will immediately see a page with quick and basic settings for our Tenda N3 router. By the way, this is very well thought out. You can configure your router in just a few steps and everything is on one page.
We need to fill in the following parameters (see the description and screenshot below):
- Under number 1, the screenshot shows the IP address for entering the settings.
- On the contraryAccess Method, we need to choose the type of connection your ISP uses. It is very important to choose a steam connection. If you do not know which type to choose, then you can call the provider and ask. Or, look at their website. Perhaps you will find useful an article on what type of connection you need to specify when configuring the router. Several nuances: ADSL Dial-up, this is the same as PPPoE, this type of connection is used by such popular providers asTTK, Rostelecom, Home ru and others.
DHCP is the Dynamic IP connection type. It is used by such Ukrainian providers as Will, Kyivstar etc. Connection L2TP uses the provider Beeline... If you are connecting your router to an ADSL modem, then choose DHCP. - Under the number 3, in the screenshot below, I have highlighted the fields that need to be filled in with data that the provider must provide you with (perhaps this information is indicated in the documents that you received when you connected to the Internet). Depending on the selected connection type, these fields can change. For example, if you select DHCP (Dynamic IP), then you do not need to set any additional parameters.
- Below, we need to set the MAC address of the router. If your ISP does not bind by MAC address, then just click on the button Restore Default MAC... If the provider makes a binding, and you are configuring the router from the computer to which the Internet was previously bound, then click on the button Clone MAC Address... The router will copy the MAC from the computer and the internet will work. Otherwise, you will need to call your ISP and ask him to register a new MAC address for your router. It can be found on the sticker at the bottom of the router itself, or in the MAC Address field (after clicking on the Restore Default MAC button).
- And finally, the field Wireless password... In it, create and write down a password that will be used when connecting to your Wi-Fi network on Tenda N3. By default, the password is 12345678. Create a complex password, at least 8 characters. Write down your password right away so you don't forget.
- Check all the parameters again and click on the button Ok to save the settings.
The router will most likely reboot. Connect to it again, if you are connecting via Wi-Fi, then you will need to use the new password that you just specified to connect.

If you specified all the parameters correctly, then the Internet via the router should already work. If not, then you can again go to the settings, to the quick settings page, and check or change the necessary parameters.
This completes the configuration of our router. Below, I will also show you how to change the connection settings with the provider, how to change the name of the Wi-Fi network on the Tenda router, how to forward ports, configure the local network, and, very importantly, how to change the password for accessing the settings of your router (do not confuse with a password on a Wi-Fi network). If you do not need these settings, then you must change the password for access to the control panel!
To open more settings for Tenda N3, you need to go to the control panel, and click on the link on top Advanced Settings.
 A page will open with the connection status and many different settings.
WAN Settings (Internet Connection) on Tenda N3
You can edit the parameters for connecting to the provider on a separate page. In the settings go to the tabWAN settings.

These are very important settings. We have already indicated them above, on the router's quick setup page. If you incorrectly specify the parameters for connecting to your ISP, then the Internet through the router will not work, since it will not be able to establish a connection with the ISP. Wi-Fi will work, but it will be "Without Internet access", or sites simply won't open.
If you have such a problem, then most likely you need to look for its solution on this page. Check the connection type and the required parameters. Everything you need to ask on this page should be provided by your ISP.
Wi-Fi setup and password change
During the quick setup process, we have already set a password that will protect your Wi-Fi network. But, we did not change the name of this very network. Now I will show you how to do it. In the settings go to the tabWireless settings - Wireless Basic Settings... In fieldprimary SSID you can set a name for the wireless network.

Don't forget to click Ok to save the settings. To change the password for Wi-Fi, go to the tabWireless settings - Wireless Security... In the dropdown listSecurity Mode select WPA2-PSK, and in the fieldKey specify the key to the Wi-Fi network.

Click the button Ok to save the settings.
If you later want to change the password to Wi-Fi, or to access the settings of the router, you can do this according to special instructions.
Setting up a local network on Tenda N3
You can change the IP address of the router in the local network on the tabAdvanced settings - LAN settings.

As usual, save the settings by clicking on Ok.
Port forwarding on a Tenda N3 router
To configure port forwarding on Tenda routers, you need to go to the sectionVirtual server - Port range forwarding... Specify the starting and ending port (if one port, then indicate the same in both fields), then set the IP address of the device connected via the LAN network, select the required protocol (TCP, UDP, Both) and check the box oppositeEnable.

Don't forget to save your settings by clicking on Ok.
Change the password to enter the settings
A very important point. To change the password that is used to access the control panel, open the System tools tab -Change password... In fieldOld password you need to specify the old password. If you have not changed it yet, then leave this field blank. In fieldNew password andConfirm new password specify the same password, which will be used to enter the settings of your router.

Now, to enter the settings, you will need to specify the password you have set.
If you do not change this password, then everyone who will be connected to your router will be able to go into the settings and change them.
After all the settings, it is advisable to restart the router. The best way to do this is through the control panel. In chapterSystem tools - Reboot the router push the button "System tools - Reboot the router" and wait a bit.

Afterword
As it turned out, setting up Tenda N3 on your own is not at all difficult. When I first saw the settings panel, I thought it would be much more complicated. I liked that they came up with a cool home page that appears right after accessing the settings, where you can set all the necessary settings. It turns out that you can configure the router on one page. I would only add the ability to change the wireless network name and password to protect the settings.