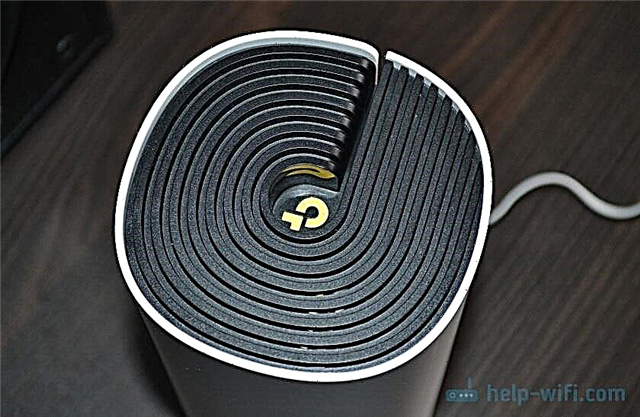
Today we will be configuring the TP-Link TL-WR942N router. Good router model for home. This is the best option for those who want good Wi-Fi coverage, stable operation, two USB ports, and a new control panel with many new features. But at the same time, he does not want to overpay for Wi-Fi 5G and 802.11ac support. It will be necessary to add this router to the article on choosing a router for the home. And also, TP-Link TL-WR942N can work with 3G / 4G modems. True, it seems like only with Russian operators so far. If I understand this issue, I will write a separate article. And today we have instructions for setting up TP-Link TL-WR942N to work with regular wired Internet. We will also set up a Wi-Fi network, set a password to protect the wireless network, and perform other necessary settings.
Setting up this router is not much different from setting up the same TP-Link Archer C8. I have introduced routers with a new control panel, which is in blue tones. This router already has Russian (you can select the language of the control panel). In my case, there was only Russian and English. The control panel is super cool. By the way, I noticed the function "Download offline". This is when you connect a USB flash drive to the router, point to a folder on it, specify a link to the file, and the router itself downloads the file to the USB flash drive. You can set up a schedule so that the download starts, for example, at night, and does not create a load on the channel. Earlier, on TP-Link routers, I have not seen a download manager. You will need to write about this feature in a separate article.
Install and connect TP-Link TL-WR942N
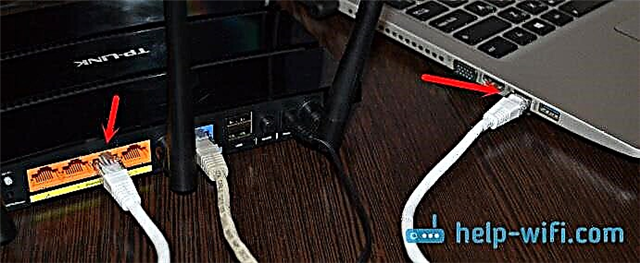
After we are happy with the purchase, we take the router out of the box and connect the power adapter to it, which in turn is plugged into the outlet. In the WAN port, it is blue, we connect the Internet. Cable from an internet provider.

Next, you need to determine from which device and through which connection you will configure the router. You can configure it both from a PC, laptop, and from a tablet or smartphone. You can connect to TL-WR942N via Wi-Fi, or via a network cable. If you will be configuring from a laptop or computer, it is better to take the network cable that you find in the box with the router and connect the devices.

If you want to configure the router via Wi-Fi, then immediately after turning on it will distribute the Wi-Fi network with the factory name. The name of the network, and the PIN code that will need to be specified when connecting, are indicated on the router itself (on the sticker below).

And if you decide to configure the router from a mobile device, you can try to do it through the TP-LINK Tether app. Although, through the browser from a mobile device, you can also configure everything, but not very convenient.
Entering the router settings
After connecting to the router, open any browser, and in the address bar, go to the address tplinkwifi.net (or 192.168.0.1). The authorization page should appear. If it is not there, and you cannot go into the settings, then see the article what to do if it does not go into the router settings for 192.168.0.1 or 192.168.1.1.
On the authorization page, you need to specify a username and password. Factory admin and admin.

The router will immediately ask you to change the username and password, which must be specified when entering the settings. Change them. You can leave the username admin, but change the password to your own. Just do not forget the password, otherwise you will have to reset the settings to the factory settings, you will not be able to enter the control panel.

If you have already tried to configure the router, then I strongly advise you to do a factory reset on the TP-Link TL-WR942N. Turn on the router and hold down the WPS / Reset button for 10 seconds.

The front panel LEDs tell you when a reset has occurred.
The preparation is complete, you can proceed to the setup.
Configuring Internet Connection on TP-Link TL-WR942N
This is the most important step in configuring your router. We need to configure the settings for connecting to the internet. Without them, the router will not be able to connect to your ISP and distribute the Internet.
Important! Before proceeding with the configuration, you need to know what type of Internet connection your ISP is using. And already, depending on the type of connection, you need to find out the data for the connection (username, password). Also check if the provider does not bind by MAC address.
Only if your connection type is "Dynamic IP" (without binding by MAC address), no settings are needed. And immediately after connecting the Internet to the router, it will distribute it (if the router had factory settings). You can skip this section.
Usually, all the information is indicated in the documents that were given to you when you connected to the Internet. If you do not know what settings you need to specify at this stage, then there is no point in continuing the configuration.
Immediately after entering the settings, a quick setup wizard will open, where you need to specify the region, Internet connection parameters, configure Wi-Fi, password, etc. The thing is cool and convenient, if you want, you can configure it through this wizard. I will show the setting in separate sections.
And so, to configure the Internet, go to the "Additional settings" - "Network" - "Internet" tab.
We select the type of Internet connection and set the necessary parameters. For example, I chose PPPoE. You can also have "Dynamic IP", "L2TP", "PPTP". We select the type, and set the parameters: username, password, server address.
At the bottom there is a section with cloning the MAC address. If your provider does not bind, then we leave "Use default MAC address". If there is a binding, and you are configuring (by cable) from the computer to which the Internet is connected, then we set "Use the current MAC address of the computer", or you can manually register the MAC. Click Save.
Once you have specified all the parameters, click on the "Connect" button. If everything is correct, then the router will connect to the Internet. We save the settings of the router with the "Save" button.

When TP-Link TL-WR942N connects to the Internet, the WAN indicator on the front panel will turn green. If it glows orange, then check the settings (I wrote about this problem in the article "why is the Internet indicator (WAN) on the TP-Link router lit orange." You can call the provider's support, they should tell you. sense to continue tuning.
Setting up a wireless network. Setting Wi-Fi password
So, the Internet has been set up, we proceed to setting up the Wi-Fi network. All we need to do is change the default network name, and change the password to protect our network.
To do this, go to the "Advanced Settings" - "Wireless Mode" tab.
In the "Wireless Network Name (SSID)" field, enter a name for your Wi-Fi network. In English letters, you can use numbers, hyphens and underscores.
In the "Password" field, enter the password that will need to be specified when connecting to your Wi-Fi network. Password of at least 8 characters.
Save the parameters using the "Save" button.

That's it, the setup is complete. You need to restart your router. Click on the "Restart" button in the upper right corner of the page.
After rebooting, you need to reconnect to the Wi-Fi network (which will already be named differently), specifying a new password when connecting. If you forget your Wi-Fi password in the future, then this article will come in handy: how to find out your Wi-Fi password, or what to do if you forgot your password.
Some helpful tips
- In the control panel of the router, you can turn off the lights that are on on the router. Just press the "LED Indicators" button and they will go out. Press the button again and they will light up.
 A useful thing if the router is in the bedroom, for example. And on the tab "Additional settings" - "System tools" - "System settings" at the very bottom of the page, you can configure the night mode of the indicators. Set the time when they will turn off and turn on automatically.
 - On the tab "Additional settings" - "System tools" - "Time settings", it is desirable to set your time zone. Remember to save your settings.
- For the future, if the settings of the router go wrong, or something else, I recommend making a backup copy of the settings immediately after setting up the router. You can do this in the "Advanced Settings" - "System Tools" - "Backup and Restore" section. Click on the "Backup" button and save the file to your computer in a safe place. In the future, on the same tab, you can restore the TP-Link TL-WR942N settings from the file.
- You can configure the speed limit for each device in the settings, on the "Additional settings" - "Data prioritization" tab.
- If you need a guest Wi-Fi network, then you can configure it using this instruction: https://help-wifi.com/tp-link/nastrojka-gostevoj-wi-fi-seti-na-routere-tp-link/
- Configuring IPTV on TP-Link TL-WR942N is done in the "Additional settings" - "Network" - "IPTV" section.
 A useful thing if the router is in the bedroom, for example. And on the tab "Additional settings" - "System tools" - "System settings" at the very bottom of the page, you can configure the night mode of the indicators. Set the time when they will turn off and turn on automatically.
That's all. I liked the router. If you bought it, then I think you will be satisfied. You can leave questions on the topic of the article in the comments. Also, leave your feedback on the TP-Link TL-WR942N router. Good luck!