Well, I got to the Wi-Fi adapters that plug into the PCI slot. By installing such a PCI Wi-Fi adapter into your stationary computer (system unit), it will be able to connect to Wi-Fi networks like laptops, mobile devices, etc. This is a great way to get rid of wires that often have to be routed to a PC after installation. router. I wrote about choosing a Wi-Fi adapter for a computer in the article: how to choose a Wi-Fi adapter for a PC (stationary computer). There I told you what adapters are, what to look for when choosing, which one is better to choose, etc.
Although I am in favor of adapters that connect via USB, there are many good PCI adapters on the market. One of these adapters is TP-Link TL-WN851ND. Time-tested model, not the newest, but popular and not expensive. In this article I will show you how to connect the TL-WN851ND PCI Wi-Fi adapter to a computer, how to install drivers on it, configure and connect your PC to a Wi-Fi network. By the way, using such an adapter, you can also distribute Wi-Fi from a computer.

Since the TL-WN851ND adapter is not new, and the official website only has drivers for Windows XP, Vista and Windows 7, judging by the reviews, some users have problems with drivers for Windows 10. I will just install it into a computer with Windows 10, so let's figure it out. I think that everything will work without problems.
In any case, we first need to install the Wi-Fi adapter into the PCI slot of the computer. Let's start with this.
How to connect PCI Wi-Fi adapter TL-WN851ND?
Turn off your computer. Unplug the power cable or the power supply with the hotel button (if available). Remove the side cover from the system unit.
Next, you need to carefully insert the TP-Link TL-WN851ND adapter into the PCI slot. If there is a metal bar on the rear wall, near the slot (in the case of the system unit), then it must be removed. Usually, just pushing it down is enough. We insert the adapter into the port until it stops. Only carefully, effortlessly.

Further, it is advisable to screw the adapter to the body. I did not find a bolt for fastening in the kit (maybe because the adapter is not new for me). But I just unscrew it in another place and screwed on the TL-WN851ND. But it's better not to do this

Then we fasten the Wi-Fi antennas from the outside of the system unit. We clamp the antennas by hand, but not tightly.

That's it, the installation is complete. You can close the system unit, connect power and turn it on.
Installing the Wi-Fi driver for TP-Link TL-WN851ND adapter
If you have Windows XP, Vista, Windows 7, or Windows 8, you will most likely have to manually install the driver on the TL-WN851ND adapter anyway. This is not difficult to do, since the driver is on the disk that comes with the adapter, or you can easily download it from the TP-Link website at the link: http://www.tp-link.ua/ru/download/TL -WN851ND.html # Driver

Just open the downloaded archive, run the Setup.exe file and follow the instructions. Let me remind you: the utility can be do not install, driver only.
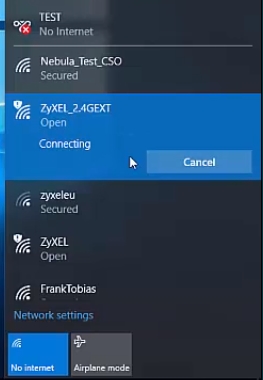
You can also install a utility for managing a Wi-Fi adapter from the disk: connecting to networks, distributing Wi-Fi, etc. But this utility is not really needed. Better not to install it. Driver only. After installing the driver and restarting the computer, it should see Wi-Fi networks available for connection (if they are in the radius). Just click on the connect icon in the notification bar. It should have a yellow asterisk (in Windows 10 it is white).
Driver for Windows 10
In my case, everything worked without installing drivers at all. Windows 10 picked up the driver for the TL-WN851ND by itself and everything works fine. This is how the "TP-Link 300Mbps Wireless N Adapter" looks like in the device manager:

Immediately I advise you to disable power off for the Wi-Fi adapter. To avoid losing Wi-Fi.
Just right click on "TP-Link 300Mbps Wireless N Adapter" and select properties. Go to the Power Management tab and disable power outages for the adapter.

After that, you can connect your PC to Wi-Fi networks.
If TP-Link TL-WN851ND does not work in Widnows 10
I saw an interesting solution in the comments on one site. If Widnows 10 did not automatically install the driver on the adapter, or there are problems with the Wi-Fi connection, then you can try the following.
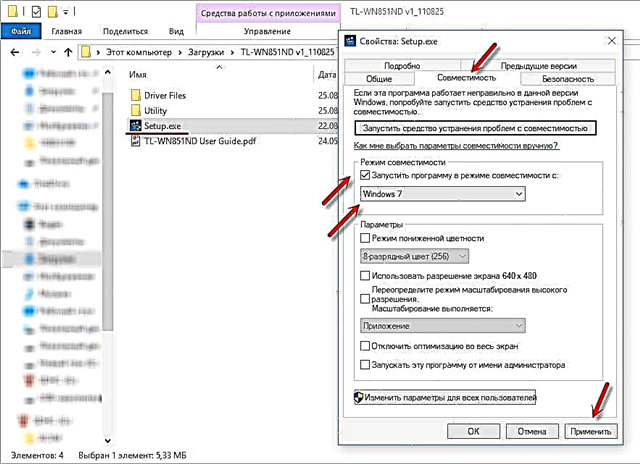
Download the driver from the official site, which is for WinXP / Vista / 7 from the link above. Extract content from archive, right click onSetup.exe and select Properties. On the Compatibility tab, enable Windows 7 compatibility mode.

Apply the settings and run the installation. I haven't tested it myself, but it can help.
If the computer does not see the PCI adapter, or Wi-Fi network
It is quite possible that after connecting the adapter to a PC, he simply will not see it. Or the adapter will be displayed in the device manager, but the computer will not see Wi-Fi networks and will connect to them accordingly. Let's look at both cases:
- If the PC does not see the connected PCI adapter at all even after installing the driver, and there is not even an unknown device in the device manager, then first of all turn off the computer, remove the adapter and reconnect it. If it does not help, then you need to check the adapter on another computer. Connect another device to the PCI slot, connect to another PCI slot (if there are several of them). Simply put, you need to find the reason.
- If the adapter is detected and displayed in the device manager, but the computer does not see Wi-Fi, then check if you screwed the antennas well to the adapter. Also check if the WLAN autoconfiguration service is enabled on your computer.
That's all. We can communicate in the comments. Leave your questions there and share useful information. Good luck!