The whole day I studied the TP-LINK NC250 cloud IP camera to prepare detailed instructions for its installation and configuration for you. This article will be useful for everyone who wants to organize video surveillance with their own hands using an IP camera (or cameras) from TP-LINK. I have a TP-LINK NC250 cloud camera, I will show it by example. But, the instruction is also suitable for other models: TP-LINK NC200, NC210, NC220, NC230, and NC450. These cameras are all very similar and the setup process will be pretty much the same.
 From the articles on this site, you can see that I am writing more about routers, setting up Wi-Fi, etc. I do not have much experience in setting up video surveillance systems. But as it turned out, everything is very simple and straightforward. Everyone can buy an IP-camera by himself, set it up in a few minutes, and watch his home, office, shop from any place where there is Internet. I don't know how other manufacturers have it (I will definitely check it), but TP-LINK has done everything very cool. Thanks to their cloud service, through which we get access to the cameras, there is no need to perform complex configuration, understand IP addresses (white, gray, external statically, dynamic). And if you read somewhere that to access an IP camera from the Internet, you need a static, "white" IP (for which you need to pay extra to the provider), port forwarding, etc., this is not the case. After all, these cameras work through the cloud. And you get access to them not by IP address, but through the site.
TP-LINK Cloud IP Camera Quick Setup Scheme:
- Installing and connecting an IP camera.
- Installing the "tpCamera" application on your phone or tablet. If you want to watch the image from the camera on a mobile device, or a computer in the local network, and not over the Internet, then this is the setting.
- Registration on the cloud service tplinkcloud.com, and adding a camera. This is necessary so that at any time, from any place and device, we can access our IP-camera. Via a browser, or "tpCamera" application on Android, or iOS.
- Additional settings: entering the camera settings, changing the factory password of the camera, updating the firmware, setting the "Detector" function, setting the video quality, etc. And also, the camera can act as a Wi-Fi network amplifier.
How it works, what is it for, and what kind of cameras:
A little more text, and let's move on to setting up, honestly 🙂 The whole scheme works very simply. We have a Wi-Fi router that is connected to the Internet. We connect a cloud IP camera, in my case TP-LINK NC250 to this router via Wi-Fi, or using a network cable. It should be noted that you can do without a router, and connect the Internet directly to the camera, if necessary. But I haven't tried it. That's it, now from all devices that are connected to the same router as the camera, we have local access to the IP camera from a computer or mobile devices. Well, after setup, we will have access to the cloud camera from the Internet. That is, we can be located anywhere, and to conduct video surveillance, we only need access to the Internet.
You can use these cameras for anything. A friend of mine, for example, uses such a scheme to monitor his store. And this is very convenient. Also, you can monitor the house, children, sick, etc. All cloud cameras from TP-LINK have an e-mail notification function as soon as the camera detects any movement or sound. Which is very cool when observing an empty house or apartment. We receive a notification, go directly to the application, or to the site, and see what happens there.
As for the cameras themselves, I am not familiar with all the models. I have a TP-LINK NC250, and it has another very cool thing - night vision. In order that even at night, one could observe what is happening, for example, in the house. This function works at a distance of up to 5.5 meters. And it really works, even in total darkness. I'll show you a screenshot in the article. And so, the cameras are almost the same. They differ only in resolution and in some functions. The cheapest TP-LINK NC200, for example, does not "see" at night.
Installation and connection of cloud IP camera TP-LINK NC250
Connect the power to the camera, and plug the power adapter into a power outlet. If necessary, use the supplied extension cord. Install the camera in the desired location. It can even be mounted on a wall or ceiling.
We connect the camera to the router. If you will connect with a cable, then we simply connect it to the router. But, most likely, you will be connecting the IP camera to the router via Wi-Fi. This is very easy to do. On the camera, press the button once. WPS / RESET... The indicator will start flashing. And immediately press the WPS button on your router... On different models, this button is positioned and labeled differently. If the button is signed "WPS / RESET", then do not hold it for a long time, no more than 3 seconds. The router settings can be reset.

When the indicator on the front of the camera turns on (not blinking) green, the camera is successfully connected to the router.
If you cannot connect, or there is no WPS button on the router, then establish a connection to the required Wi-Fi network through the control panel of the IP camera (I will write at the end of the article how to do this). But, everything should work out with a button.
What we have: our camera is connected to a router. Now, from every device that is connected to the same router, we can access video surveillance. On mobile devices via the tpCamera program, from computers via a browser (in the camera control panel), or via a proprietary programTP-LINK Camera Control... In which you can take photos from the camera, record videos and perform other settings. By the way, up to 36 cameras can be linked in TP-LINK Camera Control.
Next, we will look at two ways in which you can access an IP camera from TP-LINK:
- Via the Internet (cloud)... This method is suitable when you need to access the camera from your phone, or computer, from another location. Where you have internet, but you are not connected to your Wi-Fi network (to which the camera is connected). In the case of remote monitoring of a house or other object, this method is for you.
- Local network access. Here we will not use cloud access, but will connect to the camera locally. This means that your device from which you want to monitor must be connected to the same router as the camera. In this case, you do not need to register on the tplinkcloud.com website and perform other settings that are unnecessary in your case.
How to Access TP-LINK Cloud IP Camera via Internet
First of all, we need to register at https://www.tplinkcloud.com/register.php. Follow the link, enter your e-mail, password twice, and click on the Ok button.

Further, a letter will be sent to the specified mail, in which you need to follow the link to confirm registration. We go over and go to the site under the data that you specified during registration. Try not to forget these data (mail and password), now they will still be useful to us. We are leaving the site for now.
How to conduct video surveillance from a phone or tablet
On a smartphone or tablet that runs on Android or iOS, you need to install the applicationtpCamera... Everything is simple here, we look for it in Google Play, or the App Store and install it.
After installation, we go to the application and enter our data, under which we registered on the site. Click on the "Let's get started" button, and select the model of your camera. I have a TP-LINK NC250.

We look at the connection diagram. Look at your camera and make sure the indicator is green. Click on the "Yes, let's continue" button. The program should see your camera. Select it. Next, you need to set a name for the camera. You can leave the default if you want. That's it, the camera will appear in the program.

If we click on the camera, then we can conduct video surveillance. Take screenshots, or record videos. Our records will be available on the "Archive" tab in the program. Also, you can click on the settings button (in the form of a gear), and change some camera parameters. For example, turn off the indicator on the front panel, or even update the camera firmware.
Please note that in the window with camera settings, you can see its IP address. At this address, through a browser on the local network, you can go to the TP-LINK NC250 IP camera setup.

As promised, I show how the camera "sees" at night. The photo was taken in complete darkness. The camera itself determines when to switch to night mode.

We figured out everything how to access your IP camera through the cloud from a mobile device from anywhere in the world. In this way, you can connect multiple cameras. Just add them through the tpCamera app.
How to connect to TP-LINK camera via browser
All you need to know is the email and password with which you registered on the tplinkcloud.com website. From any browser we go to the site, go under our data, and see our camera. Which must first be added through the program on the mobile device (as I showed above).
If you want to watch the camera over the Internet, only through a browser, without installing the tpCamera application, then the camera must be linked to your account on tplinkcloud.com through the control panel of the camera itself. I'll show you how to do this below.
Most likely, you will not immediately see the picture from the camera. You will need to install a special browser plugin. Click on the link, download, run and install the plugin.

Restart your browser. You may need to enable the plugin (prompted). The camera image should appear. All cameras you added will be displayed on the site.

For some reason, the image appeared only in the Chrome browser and Internet Explorer.
That's all, we have already figured out how you can organize video surveillance over the Internet. It's very simple, we have an account on TP-LINK Cloud, to which we link our cameras, then just go in and view them through the website, or from mobile devices through the application.
Setting up local access to the camera (from devices on the same network)
If you do not need to access the IP camera via the Internet, but only from devices on the local network, then everything can be organized much easier, without registering on the tplinkcloud.com website.
Attention! In the way that I will show below, it will be possible to access the camera only from those devices that are connected to the same network (router) as the camera itself.
This method works well if you need to monitor another room, for example, in which a child is. In this case, it makes no sense to use a cloud service.
From mobile devices:
Everything is very simple. If you want to watch the image and listen to the sound from the camera through a mobile device, then install the same tpCamera application, which I wrote about above. Only after logging into the application, do not go to your account on TP-LINK Cloud, but click on the "Local" button.

You will see all cameras that are on your local network. And you can view them.
From a computer via TP-LINK Camera Control software:
The TP-LINK Camera Control software itself can be downloaded from the TP-LINK website. This program allows you to connect up to 36 TP-LINK cameras and monitor them. You can also record video and take photos.
All you need to do is install the program itself and run it. At the first start, we will need to come up with and provide a username and password. This data will be used to protect access to the program.

The program, although in English, is not difficult to understand. All cameras in our local network will be displayed there, you can take a photo, start video recording. On the tab with settings, you can change the video recording parameters, and select a location on your computer to save the recordings.

Please note that the Devices tab displays the IP address of the camera, which you may need to enter the IP camera settings.

If the functionality of the TP-LINK Camera Control program is not enough for you, then you can try using other programs for video surveillance.
Also, the picture from the camera is displayed in the control panel of the camera itself. But again, not in all browsers, and you need to install the plugin.
Login to the control panel, and setting up the TP-LINK NC250 IP camera
To enter the control panel of an IP camera, we need to find out its IP address. This is not difficult to do. The address is specified in the TP-LINK Camera Control program, or tpCamera (wrote about this above). Also, the IP address of the camera can be viewed in the settings of the router to which it is connected. In the settings of the router, we look at the list of clients, or the list of clients of the DHCP server.
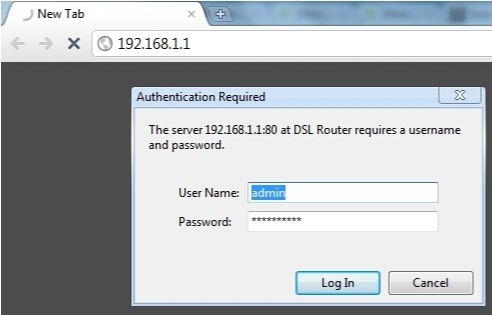
For my camera, the address was always 192.168.1.174. We open it in a browser. You will be prompted for a username and password. By default: admin and admin (indicated on the sticker on the bottom of the camera stand).

The settings are in English, but there is nothing complicated there. If you install the plugin, then most likely, the picture from the camera will be displayed on the main window.

There are many different settings. It is unlikely that they will all be useful to you. I will show you how to configure just some of the functions that you might find useful. Well, let's change the factory password admin to access the camera.
Connecting the camera to a router
On the "Basic" - "Wireless Connection" tab, you can connect the camera to our Wi-Fi network. If this did not work out by pressing the WPS buttons, as I showed at the beginning of the article. It is enough to select the desired network, specify the password for the network, and it will connect.

Connecting the camera to TP-LINK Cloud
If you have not connected the camera to the cloud service through the tpCamera mobile application (as I showed above in the article), then you can do this from the control panel. On the "Basic" - "Cloud Setting" tab, just enter the data from your account, and enter (how to register, I wrote above). Your camera will appear on the tplinkcloud.com website.

TP-LINK IP camera as a repeater (Wi-Fi network amplifier)
These cameras have another very useful feature. They can simultaneously work as an amplifier (repeater). That is, the camera will strengthen the Wi-Fi network in which it is connected. You can enable this function in the control panel, on the "Advanced" - "Wireless Extender" tab. Just check the checkbox next to "Enable" and save the settings.

You will immediately notice that the Wi-Fi signal near the camera will become much stronger.
Motion and sound detection with email notification
Above, I already wrote about such a possibility. As soon as the camera detects any movement or sound, it will immediately send you an email notification.
First, on the "Advanced" - "Motion Detection" tab, you need to enable the function, and configure the area that the camera will monitor. If any movement appears in this area, a notification will be sent to you. Also, you can set the sensitivity of the camera.

If necessary, on the "Advanced" - "Sound Detection" tab you can also enable sound tracking.
Well, on the "Advanced" - "Notification Delivery" tab, you need to set up notifications by e-mail, or via FTP.

I will not dwell on this. If you have any problems with setup, see the article on the official website tp-link.com/en/faq-900.html.
IP camera protection. Change password admin
Camera settings are protected by username and password. Factory admin and admin. It is desirable to change them. This can be done in the settings, on the "System" - "Account" tab. To change the password for the standard user admin, click on the "Change Password" button. Enter the old password and the new one twice.

Save your settings.
Afterword
The article turned out to be great, but I hope it is informative. I think you managed to set up video surveillance with your own hands using IP cameras from TP-LINK. In fact, nothing complicated. Of course, everyone has different tasks and conditions. Therefore, the settings and the circuit itself may differ from mine.
If you still have any questions, then ask them in the comments. Share tips. Good luck!