In this manual you will find all the information you need to set up your Netis WF2411 router. This means the complete configuration of a new router to work with a provider, setting up a Wi-Fi network, setting a password for a wireless network, etc.
The Netis WF2411 is actually a very interesting model that attracts buyers with a low price and good reviews. Before buying this router, I read a lot of information on it and reviews, including, since I was not familiar with Netis routers. I decided to buy and check what kind of device it is. I will not talk about any technical characteristics now, since you have most likely already bought a router and want to set up your Netis as soon as possible. This is what we will do now. I read in the comments that after resetting the settings on this router, it does not go into the settings, and the settings fly off after a reboot. I checked everything and found no such problems.

I really liked the Netis WF2411 control panel. Everything is done very simply and thoughtfully. Everything is clear, besides there is a Russian language. I think there will be no problems with setting up, especially with such a cool instruction like this one 🙂
Out of habit, we will configure the router according to the standard scheme:
- I will show you how to connect Netis WF2411 to the Internet and to a computer.
- Let's go to the settings of our router, and configure the Internet (connection to the provider). Let's consider the settings for both dynamic IP acquisition and PPPoE, PPTP, L2TP.
- Next, let's set up Wi-Fi on Netis, and set a password for the wireless network.
- Let's set a password to protect the settings of the router.
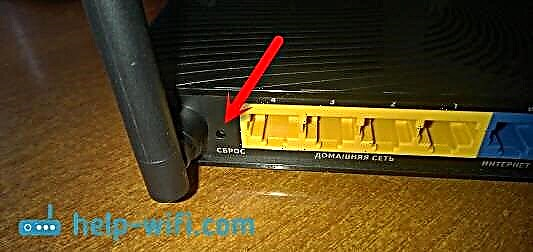
This guide will work seamlessly for either the new router you just bought or reconfiguring. If your router has worked with another provider before, or you have already tried to configure it, then I advise reset settings... To do this, connect the power to the router, and for 10 seconds press the Default button recessed into the case. After this procedure, you can start configuring Netis WF2411 (or another model that you have).
Netis router connection
First of all, connect the power cable to the router, and plug it into an outlet. Further, in the WAN connector of the router, you need to connect the Internet (cable from an Internet provider), or from an ADSL modem. It looks like this:

Now we need to connect to the router from the device from which we will configure it. If you have a stationary computer or laptop, then it is best to connect it to the Netis WF2411 using the supplied network cable. We connect one end of the cable to the router in LAN connector, and the other end to the computer's network card.

If you want to configure the router via Wi-Fi, then simply connect to the wireless network, which will appear immediately after turning on the router. It will have something like this name: "netis_C2323B"... To connect, you will need to use a standard password. I have: "password"... The network name and standard password are on the underside of the router.

After connecting to the router, you can start configuring it.
Internet setup on Netis WF2411
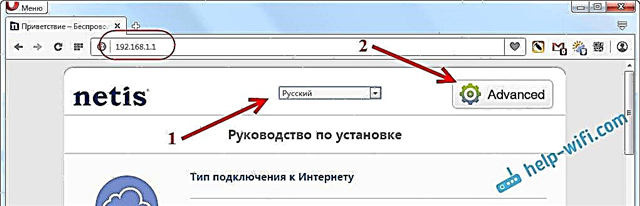
Open any browser (the manufacturer recommends Chrome or Internet Explorer), I configure via Opera. Type the address in the address bar 192.168.1.1, orhttp://netis.cc, and follow it. A page with router settings will open. I have prepared another separate instruction for entering Netis settings.
If you want, you can update the firmware of your router before setting up. This can be done according to the instructions in which I wrote about the firmware of Netis routers. You can also update the software after setting it up.
You will see a quick settings page. On it you can configure the connection to the Internet provider, and Wi-Fi. But first of all, I advise you to change the language of the control panel to Russian, and by clicking on the button Advanced, go to advanced settings. There we will set everything up.

Then go to the left to the tab Net – WAN... There are very important settings here, if they are set incorrectly, then the Netis WF2411 router will not be able to connect to the Internet and distribute it. What type of connection your Internet provider uses, you need to check with the provider itself. It can be: Dynamic IP, Static IP, PPPoE, L2TP, PPTP. If your connection type is not Dynamic IP, then you should also have parameters for connection: username, password, and possibly an IP address. This data is provided by the provider.
In the dropdown menuWAN connection type select our connection type and, if necessary, set the required parameters.

For example, setting up a popular connectionPPPoE (Beeline, Dom.ru) on a Netis router will look like this:

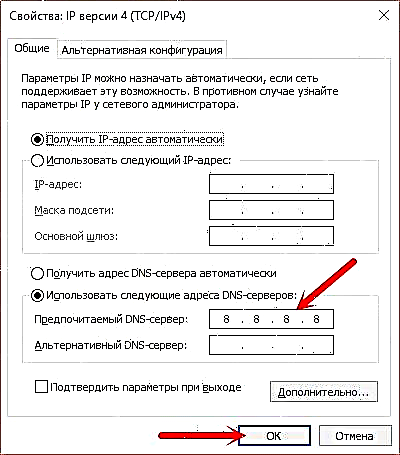
To save the settings, click on the button Save... If you need to set any special parameters, for example: clone the MAC address, set DNS addresses, server name, etc., then click the button Extended, and additional settings will open.
The main purpose of these settings is for the Internet to start working through the router. If you are connected to a router and the Internet is already working, and there is no "no Internet access" status, then everything is fine. Save your settings and follow these instructions. If you cannot set up an Internet connection, then I advise you to check the settings again, check them with the provider, and read this article.
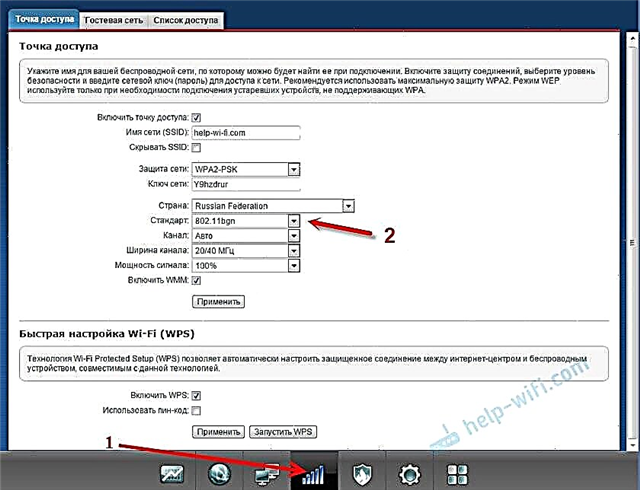
Setting up Wi-Fi and setting a password on the Netis WF2411 router
Under the wireless network setting, I will enter a change in the name of this very network. If you are not satisfied with the standard name. And of course, I advise you to protect your Wi-Fi network with a good password.
To do this, in the settings go to the tab Wireless mode – Wi-Fi settings (if necessary, select a 2.4G network, or 5G if the router is dual-band). On this page we are interested in the SSID field, where we write the name of our wireless network.
To set a password, in the drop-down menuAuthentication type select WPA2-PSK... And in the field Password, create and write down a password that will be used to connect to your Wi-Fi. Password must be at least 8 characters, English letters and numbers.

It is better not to change other parameters. Click the button Save... After that, you will need to connect to Wi-Fi with the new password that we have set. Try not to forget it, and if you do, this article will come in handy.
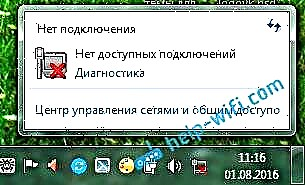
If you have changed only the password, then on computers that have previously connected to this network, an error may appear: "Windows could not connect to", or "The network settings saved on this computer do not meet the requirements of this network." In this case, you just need to delete the network on the computer and reconnect.
Set a password to protect settings
Everyone who connects to your router will be able to access its settings. Therefore, I advise you to set a password, the request for which will appear when you enter the control panel. To do this, go to the settings tab System – Password... Enter your username, I recommend admin, and enter your password twice. This password will need to be entered only when entering the settings. Click the button Save.

Now when you enter the settings of your Netis WF2411, you will be prompted for a username and password.

That's all, now the settings of our router are securely protected. The main thing is not to forget this password, otherwise you will have to reset the settings.
I showed you the basic settings, after which you can connect to the router and use the Internet. He is completely ready to go. Such instructions as: setting up IPTV, blocking clients, port forwarding, etc., I will prepare in separate articles.
If you still have questions about the Netis WF2411 settings, then leave them in the comments. Describe your case well, and I will try to help with advice.